Cutting Seedling raising technique of Japanese late Sakura at full flowering stage
Cherry blossoms are colorful and magnificent. They are important ornamental trees in gardens. They should be planted in front of gardens or buildings. They can also be used as street trees on paths. Japanese late cherry blossoms are excellent varieties of cherry blossoms because of their large, double, bright color, fragrant smell and long flowering period. The propagation of Japanese late cherry seedlings by grafting is slow and tedious, but it is difficult to take root by hardwood cuttage technique. Through continuous exploration and experiments, a rapid and efficient method for propagation of Japanese late cherry was finally found, that is, vermiculite was used as substrate and annual branches with tender shoots were cut in full bloom.
Japanese late cherry cuttings with tender shoots have the characteristics of fast seedling formation, simple operation, easy rooting and high survival rate. The main points of Japanese late cherry cutting techniques at full bloom are introduced as follows:

[Matrix]
Expanded vermiculite was used as matrix to maintain pH 6.2. It was found that the temperature of vermiculite seedling bed at night was 2 ℃ to 3 ℃ higher than that of soil bed, while the temperature at noon was 1 ℃ to 2 ℃ lower than that of soil bed, indicating that the temperature difference between day and night of vermiculite seedling bed was small, the accumulated temperature was large, and the heat preservation effect was good, which was beneficial to root growth. In production, granular vermiculite is the best, which has good permeability and is conducive to rooting. On the other hand, the powdered vermiculite is sticky and has poor permeability. When raising seedlings, vermiculite should not be mixed with soil, otherwise the roots will rot easily.
[cutting time]
Can be carried out from April to July, the experimental records are as follows: from the above table, we can see that the cuttage survival rate of cherry blossoms is the highest, so when the plant is in the peak period of physiological activity, it is easy to root. The seedlings were cut on April 28 and did not slow down after transplanting on June 28. 0.5 cm new buds germinated 5 days later, and the trees bloomed after 4 years of culture.
[selection and treatment of cuttings]
1. Selection of cuttings: 15 cm-long branches are cut from the sturdy mother tree, with new shoots at the top and annual branches at the bottom. The leaves on the new shoots can produce nutrients, the annual branches have been lignified, and the cuttings are easy to survive. The experimental results showed that most of the 3-to 6-year-old branch cuttings rotted and died. Thus it can be seen that the survival rate of cuttings is related to age. The older the branch is, the weaker its physiological function is, and the more difficult it is to survive.
2. Treatment of cuttings: the leaves inserted into vermiculite should be removed before insertion, and the upper leaves should be retained. The cuttings were quickly dipped in 1000ppm naphthylacetic acid. That is, insert the cuttings at the base of 2 to 3 cm into 1000 ppm naphthalene acetic acid solution, then immediately take out the cuttings and dip them with them.
[cutting method]
Use bricks to build a seedbed with a height of 20 cm and a width of 1 m (depending on the number of cuttings). The bottom of the seedbed is covered with 2-3 cm of river sand, and then filled with vermiculite 15 cm thick. Install a centrifugal sprinkler every 1 meter, or use a sprayer rod connected to the tap pipe to spray. A shady shed was built in early May, and branches were used as fences around to protect the wind. For heat preservation and moisture preservation, plastic sheds can also be set up on the seedbed. The cuttings are inserted vertically in vermiculite with a spacing of 2 cm and a spacing of 4 cm, and are filled with water after insertion. The cutting depth is 6 to 8 cm, because it is observed that the temperature at the depth of 5 cm is 2 ℃ to 4 ℃ higher than that at the depth of 10 cm, and most of the healing tissue and adventitious roots grow at 6 to 8 cm.
[management after insertion]
Spray regularly and keeping the leaves moist is the key to survival. There are more times of spraying at noon when the temperature is high, and the interval is shorter. Do not spray when there is dew at night and in the morning, the relative humidity of the air is kept above 90%, and the humidity of vermiculite is maintained at 58% to 60%. This target must be achieved before taking root, especially before the formation of healing tissue. In early May, a shade should be set up to protect against the scorching sun. When the temperature in the plastic shed exceeds 35 ℃, open both ends of the shed for ventilation and seal it when the temperature drops to 27 ℃. If the weather is too hot, water can be sprayed outside the plastic shed, which can not only cool down but also avoid excessive water content of vermiculite.
[transplanting time and method]
Transplant in time when the root system of cuttings grows to 6 to 8 centimeters. After transplanting too late, the root system of the cuttings will turn brown and rot, and the leaves will gradually turn yellow. This is because vermiculite can only keep warm, moisturize, aerate and promote root, but there are no nutrients for cuttings to continue to grow. In addition, the cuttings with few roots or only callus without rooting should be kept in the seedbed until the roots grow well before transplanting.
Creating an environment suitable for the continuous growth of cutting seedlings is the key to ensure the survival of transplanting. A fertile plot without stagnant water should be selected to make a north-south border with a length of 8 meters and a width of 0.3 meters, mixed with sandy loam soil 30 cm deep, and then covered with 2 cm thick sandy loam soil. Flatten the border surface, plant a row in each border, plant 30 cm apart. Put the root system of the cuttings together with the surrounding vermiculite into the planting hole and cover the hole with sand. Don't press hard so as not to break the tender roots. Then fill the border with water and build a 1. 2-meter-high shade on it. Spray 2 to 3 times a day, keep the leaves moist, the ground is often watered, dry and wet. The seedlings transplanted in this way are not slow, the survival rate is high, and the growth is normal.
Time: 2019-06-11 Click:

- Prev
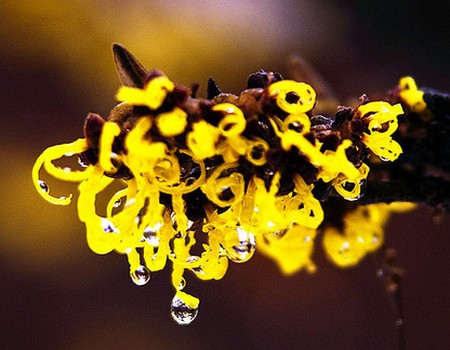
Propagation Technique of Hamamelis chinensis by Layering
Witch hazel is mostly born on hillsides, valleys and other places. It is an alpine tree species and a warm-ground tree species. However, witch hazel has strong cold resistance and can grow in the open at minus 15℃. Witch hazel is mainly propagated by sowing, but also by layering and grafting
- Next
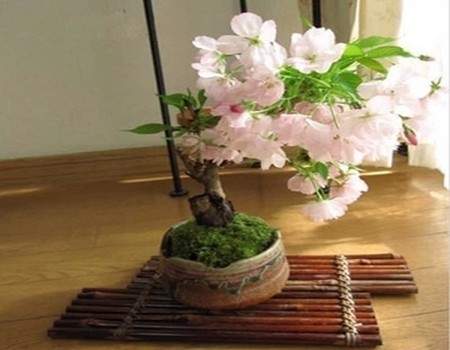
Propagation technique of Japanese late Sakura
When it comes to cherry blossoms, perhaps most people think of cherry blossoms that can be seen everywhere in spring in Japan. But few people know that cherry blossoms are divided into early cherry and evening cherry. Morning Sakura is charming and charming, which fades after a short period of brilliance, resulting in a magnificent life. But the late cherry flowers are heavy, graceful and have a long flowering period, but it is not as good as the early cherry.
Related
- Fuxing push coffee new agricultural production and marketing class: lack of small-scale processing plants
- Jujube rice field leisure farm deep ploughing Yilan for five years to create a space for organic food and play
- Nongyu Farm-A trial of organic papaya for brave women with advanced technology
- Four points for attention in the prevention and control of diseases and insect pests of edible fungi
- How to add nutrient solution to Edible Fungi
- Is there any good way to control edible fungus mites?
- Open Inoculation Technology of Edible Fungi
- Is there any clever way to use fertilizer for edible fungus in winter?
- What agents are used to kill the pathogens of edible fungi in the mushroom shed?
- Rapid drying of Edible Fungi