Bending skills in bonsai modeling
The bending of branches has always been one of the key techniques to be mastered in bonsai modeling, and the quality of bonsai skeleton determines its value in most cases; taking bending as an important means of shaping bonsai skeleton can also reflect its "profound skills" in making bonsai. The technologically strong can always handle the skeleton with a rich curve without losing its nature, free from its nature, vigorous and dynamic.
Taking bends is a basic skill that must be mastered in bonsai production. When I first learned bonsai, I was always afraid that the branches would be broken. How can I take the bend easily? Today, let's talk about some basic skills of holding bends.

The wood of each kind of tree is different. Some are more flexible and easy to bend. Some wood is brittle and easy to break, so it is not easy to bend. Common pine and cypress trees are very flexible. Miscellaneous trees such as maples are more brittle. And the younger branches (unlignified or semi-lignified branches) are more flexible and easier to bend. So I generally suggest that the sooner you take the corner, the better.
The most commonly used bending method is wire winding.
Figure 1 of ▲, before taking the corner
Figure 2 of ▲. After the wire is bent
The demonstration was conducted by a small cypress. When you hear a slight click or a slight crack in the branch (trunk), it means that the bend has reached its limit and can be stopped.
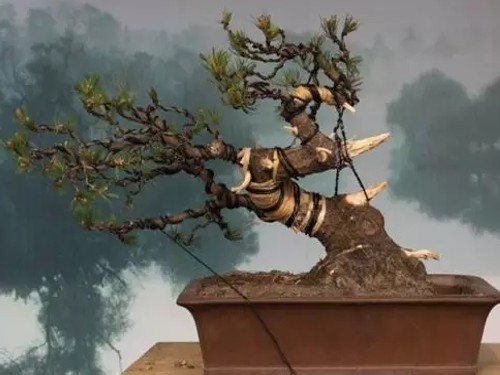
If you want to make a large bend, you need to wind the hemp or tape at the bend before winding the wire. Winding twine or adhesive tape can help disperse the force at the bend and avoid breaking when holding the bend. Even if the bend is cracked, the thread (adhesive tape) can connect the broken parts together, which is more conducive to wound healing. After the wound healed, there was almost no sign of fracture.
Figure 3 of ▲. Another demonstration of a small cypress tree before bending.
▲ figure 4. Winding the corner with adhesive tape
▲ figure 5. Winding wire
▲ figure 6. After taking the bend
If you want to bend the big branch, the first two methods are not suitable. The broken pole method can be used at this time. After breaking the bend with a rod-breaking clamp, and then combining the first two methods, it will be much easier to take the bend.
▲ figure 7. Before breaking the pole
▲ figure 8. Break the tree trunk in two with pole-breaking forceps
The big branch can be broken 1-3 times in different directions when holding the bend. The material in the picture above is too small, it only needs to be broken once.
After breaking the pole, use the first two methods, first winding the tape and then winding the wire. And then take the bend. You will find it much easier to take the bend after breaking the pole.
▲ figure 9. After taking the bend
When holding the bend after breaking the pole, it will be easier to take the bend if you combine the twisted trunk (branch). In this way, the pressure of holding the bend can be better dispersed.
If you can't get the bend in place for a while, you can rest for one or two weeks before taking the bend further. After a week or two, the bend is adapted to the bend and a certain amount of pressure is released, which makes it much easier to take the bend.
▲ figure 10
The picture above is the effect of taking a further bend after resting for a week.
When can I remove the wire? Different tree species have different times. I usually remove the wire after a year. After a year of growth, the bends are usually set. But remember to always observe that if you find that the wire is beginning to bite into the bark, it should be removed immediately. If the bend is not in place, the wire can be re-wound to shape.
In the actual operation, it is far more than the methods summarized above, but no matter which or which methods are used at the same time, they should be used flexibly according to the needs and fully considering their respective advantages and disadvantages and the situation after recovery. You can't take the bend just for the sake of taking the bend. The purpose of the above discussion is also to exchange experience. If there are any deficiencies, please criticize and correct them.
Time: 2019-06-10 Click:
- Prev

Sprouting technique of five-needle pine bonsai
Bonsai is a concrete and subtle expression of natural features, as well as a profound and sincere exploration and reflection of natural beauty. The five-needle pine has a good posture and is a tree species with high ornamental value, which is not only suitable for garden decoration, but also an important tree species for potted plants or bonsai; it is necessary to maintain a good tree posture and control the growth of branches and leaves.
- Next

Cutting Propagation method of potted Chrysanthemum morifolium
Some people on the Internet say that blue chrysanthemum is easy to insert, and should often hit the tip, otherwise it will run very high, and then it will fall down, and it will be very ugly. If you hit the tip and insert it, you can insert a lot of it. This color is also many, so it is worth planting! Use a white plastic basin with a small amount of yellow sand at the bottom and cover with transparent glass to see scattered light. It's good. Cuttage.
Related
- Fuxing push coffee new agricultural production and marketing class: lack of small-scale processing plants
- Jujube rice field leisure farm deep ploughing Yilan for five years to create a space for organic food and play
- Nongyu Farm-A trial of organic papaya for brave women with advanced technology
- Four points for attention in the prevention and control of diseases and insect pests of edible fungi
- How to add nutrient solution to Edible Fungi
- Is there any good way to control edible fungus mites?
- Open Inoculation Technology of Edible Fungi
- Is there any clever way to use fertilizer for edible fungus in winter?
- What agents are used to kill the pathogens of edible fungi in the mushroom shed?
- Rapid drying of Edible Fungi

