Ivy cutting method-step diagram
Ivy is also called Ivy. Its shape is beautiful and regular, is very suitable for beautifying home plants, especially in the wider living room, study, living room display, elegant style, simple, and with southern flavor. At the same time, ivy is suitable for families with smoking. It absorbs carcinogens from secondhand smoke, helps purify the air, and, more conveniently, requires less careful care.
Spring blooming is a good time to enjoy the flowers and step in the spring. Looking at the vitality of the suburbs and lingering with green eyes, do you wish you could not move them back home? So, I'm telling you, it's simple, pinch a piece of ivy outside and see what miracles happen!

Suitable cutting time: spring and autumn are the best cutting time for ivy.
Unsuitable cutting time: the temperature in winter and summer is either too high or too low, and ivy is in a dormant period, which is not conducive to ivy cutting.
Main points of cutting: take the ivy branches with three to five nodes, remove one or two leaves from the lower part, insert them directly into the prepared substrate, pour water thoroughly, and take root and sprout after two to three weeks.
1. Select cuttings
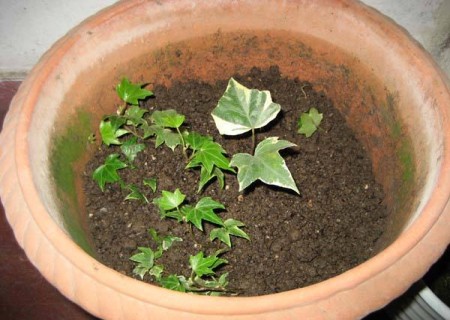
Branches and potted soil should be prepared before cutting on duty. Pinch a branch about 30 centimeters long from the top of the ivy and cut it into three cuttings when you get home. When cutting, make sure that the leaves are intact and there are no insect tracks above the branches. There are ivy in many places, and cutting a piece of it won't affect its growth.
After cutting off, it is best to wrap the end fracture of the branch with a paper towel, and then wet the paper towel and cover it with a plastic bag to prevent the branch from evaporating and withering. Cut off the leaves at the bottom when you get home.
2. Prepare the basin soil
When you get home, find some disposable plastic cups and poke holes in the bottom instead of flowerpots. This kind of flowerpot has several advantages: the soil is less, and the branches are not easy to rot. Secondly, the cup is transparent, can clearly see the rooting situation, can be transplanted in time. And covers a small area.
3. Cuttings
After putting the soil in the cup, poke several small holes in the soil with chopsticks and insert the branches, basically one for each cup. Press gently with your fingers to prevent the branches from staggering when watering.
4. Management and maintenance
Water the cuttings thoroughly and put them in a bright place with plenty of sunshine. Water more water at the beginning, once every two days, and gradually reduce the number of times of watering after a week, and then water again when the soil is dry. When the temperature is controlled between 15 and 20 ℃, it will take about 20 days to take root. Do not transplant immediately after rooting, let the seedlings grow in the cup for a period of time, and then a month later the root system is well developed, it can be transplanted into the pot.
5. Transplanting seedlings
Transplanting is also very simple, just plant the seedlings upright in the soil. After transplanting, slow down the seedlings in a cool place for about 1 week, and then maintain normally. Friends who like a large fluffy pot can plant two plants in a flowerpot and grow relatively.
Ivy cutting methods / steps:
1. Cuttings selection: cut 3-5 nodes from the top of ivy, 5 cm long healthy terminal buds as cuttings, remove 1-2 leaves at the bottom.
2. Branch treatment: you can also take a section of robust branches for cutting, remove 1-2 pieces below it, and cut the appropriate length.
3. Prepare utensils: cut three or four holes at the bottom (disposable cups) so that there is less soil, dry and wet alternately, and the rooting of plants can be clearly observed, which is more convenient for transplantation and covers a small area at the same time.
4. Load the soil: put in the breathable soil, or the sand, and poke a hole in the soil in the middle of the cup with your fingers or chopsticks.
5. Insert branches: put at least one branch that cuts off leaves in the soil.
6. Press the soil: fill the soil and press the soil around the cuttings slightly so that it will not stagger when watering.
4. Proper watering: place it in a bright place without direct sunlight after watering through. In the first few days, you can water every two days or so, and after about a week, you can gradually reduce the frequency of watering.
Under the condition of proper management and suitable temperature, it can take root in about 15-20 days. Do not rush to transplant after rooting, let the seedlings continue to grow in the cup for a period of time, after a month and a half, the root system has developed well, you can transplant to a larger flowerpot.
After the seedlings are transplanted, pour water thoroughly, first slow the seedlings in a place where there is no direct sunlight for two or three days, and then you can see the sun. Ivy has strong vitality and is easy to manage. in general, watering can be seen dry and wet. It is no problem to water it indoors once every half a month in winter.
Time: 2019-06-09 Click:

- Prev
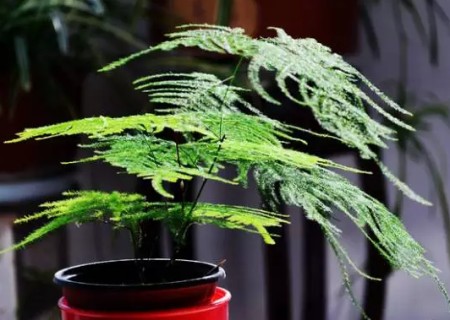
How to trim asparagus bonsai
Asparagus has graceful posture, soft branches, orderly height and elegance, but if it is not pruned, it will grow taller and taller. Asparagus is a climbing plant with semi-fleshy roots, and its growth is very fast. After a few years of culture, the branches will grow taller and taller, usually as long as 2 to 3 meters or even longer.
- Next
Propagation method of Ivy
The leaf color and shape of ivy are varied, evergreen all the year round, is a beautiful climbing plant, can be used as scaffolding or wall vertical greening. It is also suitable for indoor pot culture, and it is also a very good indoor foliage plant, which can be used as potted plant, hanging basket, totem, plastic plant and so on. Ivy is also the configuration material for cut flowers.
Related
- Fuxing push coffee new agricultural production and marketing class: lack of small-scale processing plants
- Jujube rice field leisure farm deep ploughing Yilan for five years to create a space for organic food and play
- Nongyu Farm-A trial of organic papaya for brave women with advanced technology
- Four points for attention in the prevention and control of diseases and insect pests of edible fungi
- How to add nutrient solution to Edible Fungi
- Is there any good way to control edible fungus mites?
- Open Inoculation Technology of Edible Fungi
- Is there any clever way to use fertilizer for edible fungus in winter?
- What agents are used to kill the pathogens of edible fungi in the mushroom shed?
- Rapid drying of Edible Fungi