Illustration of grafting technique of bonsai skin insertion
For bark grafting, the phloem of rootstock is easy to peel off, and the rootstock is thicker than scion. The scion should be cut longer to increase the contact surface. The advantage is that the survival rate is high, and the disadvantage is that the grafting speed is slow, and after survival, it is necessary to bind the new shoots with stents to prevent fracture. Mulberry, it is best to insert the cutting face of the scion into the cortex of the rootstock (after the cambium of the mulberry is separated from the cortex of the rootstock, there are more parenchyma cells remaining on the phloem), and the scions of other tree species are generally inward.
Through several years' practice and the comparative experiment of several branch grafting methods, the author thinks that the survival rate of skin grafting is the highest, but the rootstock must be removed from the skin. The following is a diagram of the operation steps of bonsai skin grafting:
1. Choose the plant varieties and rootstocks you want to graft.
In order to be successfully grafted, you must cut a scion (a small piece for grafting) from a healthy disease-free plant variety (source tree) and a suitable growth tree (rootstock). The scion should reach three dormant periods, or it is not budding. There are three to five buds on the branches about 0.3 m long. The rootstock should be straight and smooth, with vertical branches 2.5-5 cm in diameter. Once the bark has begun to slip (when it is easy to peel off in the spring), it is time for a bark transplant. This kind of grafting is usually used when the rootstock is too big to do branch grafting.
2. Sawing off the rootstock
Cut straight off one of the branches with a sharp saw, without cutting the bark or wood of the branches. Be sure to leave a nearby sprouting branch to keep nutrients moving to the tree.
3. Prepare scion
Cut the scion to about 12.5 cm long, while each scion retains about 5 buds. Begin to cut diagonally to the base from around 7.5 cm of the scion.
4. Prepare rootstocks
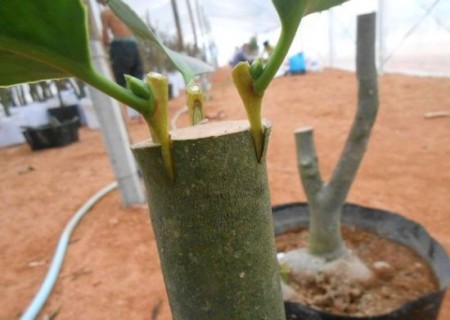
Place each scion opposite the rootstock and expose a scion section of about 0.3 cm to the rootstock. Use a sharp knife to cut the outline of each scion on the rootstock. Move the scion to finish cutting the bark so that each scion is tightly filled into their space.
5. Use scion
Place each scion on the rootstock, and pay special attention to ensuring that the green layers of the two are accurately aligned. Once in place, two spikes are hammered on each scion to keep them connected to the tree.
6. Sealed transplantation
Pour the graft wax or asphalt emulsion into the transplanted area and seal all cut surfaces to prevent dryness and bacteria from entering. Check the seal again the next day to make sure that no holes will expose the surface.
7. Take care of the grafting site
Remove all buds that grow under the graft. Once one scion grows better than the others, prune the others that do not grow successfully. After two summers of transplantation, remove all the branches and buds except the strong scion.
Time: 2019-06-09 Click:

- Prev
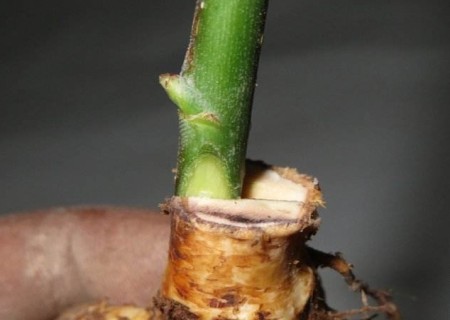
Diagram of T-shaped bud grafting of bonsai
The bud grafting method refers to the grafting method of the scion with a bud with cambium. This method must ensure that the scion is only robust and pest-free. It should be noted that the survival rate of the plant should be recorded at any time after the grafting is completed. If it is found that the bud is germinating, the bud should be released from the wrapping film in time.
- Next
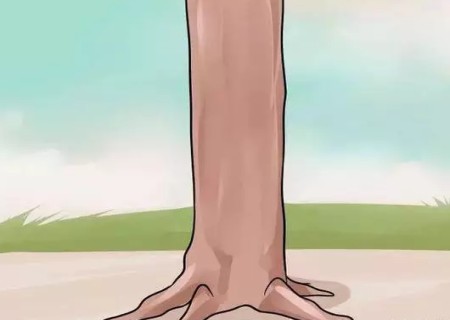
Diagram of grafting technique of bonsai cleft palate
Grafting is to artificially connect the branches or buds and other tissues of one plant to the appropriate parts of the branch, stem or root of another plant, so that it can heal and grow together to form a new plant. This branch or bud is called a scion, and the plant that bears it is called a rootstock. The grafting of flowers and trees is very skillful.
Related
- Fuxing push coffee new agricultural production and marketing class: lack of small-scale processing plants
- Jujube rice field leisure farm deep ploughing Yilan for five years to create a space for organic food and play
- Nongyu Farm-A trial of organic papaya for brave women with advanced technology
- Four points for attention in the prevention and control of diseases and insect pests of edible fungi
- How to add nutrient solution to Edible Fungi
- Is there any good way to control edible fungus mites?
- Open Inoculation Technology of Edible Fungi
- Is there any clever way to use fertilizer for edible fungus in winter?
- What agents are used to kill the pathogens of edible fungi in the mushroom shed?
- Rapid drying of Edible Fungi