How to cut geraniums
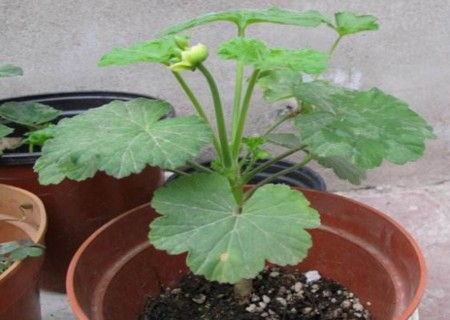
Recently, the editors' potted geraniums began to bloom again. Due to the continuous high temperature, the editors lost many valuable geranium varieties, and of course, many potted friends' potted plants also suffered heavy losses. Hey, let's not complain about it. After all, this is the age of relying on heaven for a living. Because geraniums are relatively easy to survive through cuttings, potted friends can exchange needed goods and dedicate all the high-quality resources of each family.

1. Time temperature
Our area is located in the middle and lower reaches of the Yangtze River, March-June is suitable for cutting, of course, September-November cutting is also better, because the temperature in the case of more than 20 degrees is more suitable, and root quickly.
2. Soil preparation
For the cutting substrate, it is appropriate to choose the mixture of peat, perlite and vermiculite. Vermiculite can be used at low temperature and perlite at high temperature, which is very easy for cuttings to take root. You can according to the actual situation around you, as long as it is clean, less fertile loam is also possible.
3. Select a container
In the selection of cuttings, as long as it is a strong branch on the line, generally choose to leave 3-4 nodes down from the top to cut branches, cut 0.5 cm away from the previous saving, pay attention to keep the incision smooth. Then remove the stems and leaves from the following two sections and leave 2-3 leaves at the top of the branches.
4. Cuttings
The pruned branches cannot be cut immediately and need to be left in a cool place for several hours until the wound dries. After the wound is dried, it can be inserted into a disposable cup prepared beforehand, and a medium-sized stick is used to insert a hole suitable for the branch in the culture soil before inserting the branch. Then the soil around the branch is compacted and watered.
5. Placement location
After inserting the branches, place the seedling pot in the light that can receive astigmatism, and about half a month later, you can see that the seedlings begin to grow roots. After that, the light can be increased appropriately, which is more conducive to plant rooting and sprouting and rapid growth.
6. Maintenance and management
After the plant returns to normal growth, the seedling pot can be placed on a plate with a small amount of water to moisturize it. Of course, the plant can also be properly sprayed with water, and it can be planted in the pot after about a month. For those plants whose time is up but have not yet taken root, as long as the cutting part of the branch remains good and does not rot, we can take the above methods to repeat the cutting.
7. Transplant into the pot
In about November, we will find that not only the roots of the cutting branches have become rich, but also the branches and leaves are more luxuriant. At this time, we can take out the seedlings and transplant them into the pot. Specific methods of transplanting on the pot can refer to the relevant articles launched by the editor, which have been released before.
Time: 2019-06-08 Click:
- Prev

Illustration of cutting Propagation methods of Pelargonium
As the geranium is a stem semi-succulent plant, the plant contains a lot of water, so it is easy to have rotten roots when cutting, thus affecting the survival rate of cutting. In view of this, combined with practical experience, the measures of re-pruning of geranium plants after anthesis were improved.
- Next

Illustration of how to cut lipstick orchid
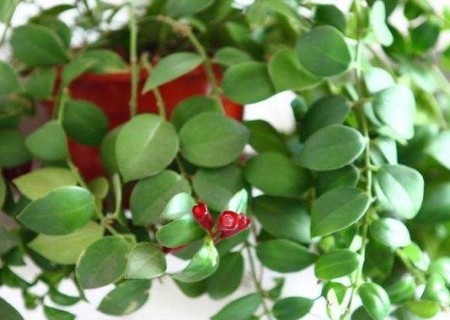
Lipstick hanging orchid, also known as flower vines or lipstick, because the flowering shape is similar to lipstick, hence the name. Lipstick hanging orchid green leaves with flowers, coupled with Corolla peculiar, is loved by the majority of flower friends, is a kind of high appreciation value of flowering plants, is the home hanging flowers in the boutique. So, how do lipstick orchids propagate?
Related
- Fuxing push coffee new agricultural production and marketing class: lack of small-scale processing plants
- Jujube rice field leisure farm deep ploughing Yilan for five years to create a space for organic food and play
- Nongyu Farm-A trial of organic papaya for brave women with advanced technology
- Four points for attention in the prevention and control of diseases and insect pests of edible fungi
- How to add nutrient solution to Edible Fungi
- Is there any good way to control edible fungus mites?
- Open Inoculation Technology of Edible Fungi
- Is there any clever way to use fertilizer for edible fungus in winter?
- What agents are used to kill the pathogens of edible fungi in the mushroom shed?
- Rapid drying of Edible Fungi

