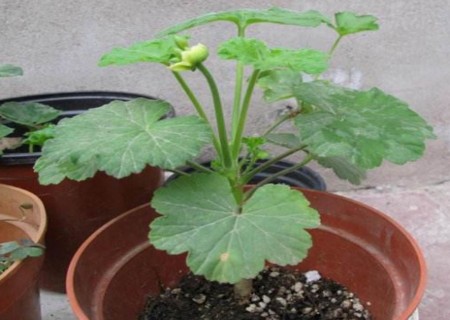
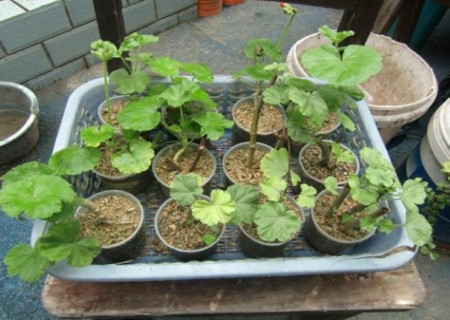
Illustration of cutting Propagation methods of Pelargonium
As the geranium is a stem semi-succulent plant, the plant contains a lot of water, so it is easy to have rotten roots when cutting, thus affecting the survival rate of cutting. In view of this, some pot friends combined with practical experience, through the measures of re-cutting of geranium plants after anthesis were improved, and the branches cut from them were taken to cuttage, which greatly improved the survival rate of cuttings. Next, the editor will share this method with you, hoping to be helpful to those who need cutting geraniums.

The main results are as follows: 1. first select the robust branches that need to be cut down from the top of the plant, every 4-6 true leaves, or cut off 7-10 cm branches into a section, until the plant is pruned and re-pruned after flowering. The pruning position and the number of cuttings should be planned in advance before cutting cuttings.
2. At 0.5 cm below the stem node, use a pruning tool to carefully truncate along the ring (similar to the girdling technique), or peel off the surface of the branch, with a width of about 0.2-0.4 cm. It should be noted that when doing ring cutting, only peel off the epidermis of the branches to ensure that the branches and leaves are still safe and sound on the plant. In doing so, the branches do not leave the mother tree and can form several segments to be cut and cuttings, and because the annular wound regulates nutrients and hormones during self-healing, so after two or three weeks, it can be seen that most of the cuttings below the top have sprouted axillary buds under stimulation, and the annular wound has healed.
3. After the wound heals itself, we can begin to cut the cuttings. At the same time, the cut cuttings should be left in a ventilated place to dry for a few hours, and after the conjunctiva of the cut becomes dry, we can insert the branches into the culture soil in the basin for cutting.
4. After cutting these cuttings, it is necessary to pour enough water into the basin and properly water it in the daily management in the future, based on the principle that the soil in the basin is dry and wet. After more than half a month, it is not difficult to find that all the cuttings have taken root at this time, and the survival rate may be as high as 100%.
Through the above improved cutting methods of geranium, it is of great significance to expand the excellent and scarce varieties of geranium and to make effective use of the branches of Geranium.
Technical points:
Girdling on the branches of the mother plant to remove the surface bark not only reduces the semi-fleshy cross-sectional area of the cuttings, but also isolates the flow direction of the production organisms after photosynthesis of the mother plant leaves. let the base of the cuttings accumulate nutrients before cutting and promote the accumulation of wound edge healing tissue to avoid wound infection, promote rapid rooting, and realize the regulation of internal nutrition.
The above are the technical improvements we have made to obtain cuttings in order to improve the success rate of geranium cutting. after we have obtained high-quality cuttings, we will begin to do cutting propagation.
Operation methods / steps:
1. First choose several disposable cups or transparent plastic cups, and make some moderate-sized running holes at the bottom. After adding the prepared culture soil, the cutting substrate can be dominated by river sand.
2. According to the above method, cut several cuttings from the geranium mother plant, about 15 cm in length, and then leave them to dry for a period of time until the conjunctiva of the wound section dries.
3. Insert the cuttings into the previously prepared container with soil. Pay attention to adjust the position of the cuttings, so that the cuttings should stand upright in the culture soil.
4. After about half a month, the geranium cuttings will take root and sprout, and we can see the white roots clearly through the plastic container.
5. When the geranium cuttings take root and sprout, and the branches and leaves grow to a certain extent, we can transplant them into the pot. The first thing we need to do is to prepare to de-pot the plant and clean up the sand.
6. Because we chose sand as the cutting substrate, the de-potting process is relatively simple. The method of operation is to soak the plant with a plastic container directly in a bucket full of water.
7. After the sand in the plastic container completely seeps into the water, it will soon become relaxed and the implant can be easily removed. After taking out the plant, we need to wash the sand from its roots.
8. after washing all the plants, put them smoothly together to dry, at the same time, it can be found that no matter the branches, leaves or roots of the seedlings grow very vigorously. It shows that our previous improved technology for cuttings is very successful.
9. Plant dried geranium seedlings into flowerpots that are ready to cultivate soil. When planting, you should pay attention to gently pinch the seedlings with your fingers, observe and adjust the position of the plants, and put the plants as straight as possible. Then cover the soil and compact the soil near the plant to fix the plant.
10. The next step is to water and plant the plant. The next step is the maintenance and management work during the seedling raising period. At this point, our process of cutting propagation of geraniums is over.
The editor has talked so much, has everyone learned it? In the process of putting the geranium seedlings on the pot, the editor attached an illustration to the text, hoping to help you understand. If you have learned it, you should try it yourself.
Time: 2019-06-08 Click:
- Prev

How to cut dry and store branches on bonsai stump
The main purpose of the shaping of branches by stump bonsai is to create the beauty of lines. However, in the process of practice, we should also use all kinds of artistic decoration techniques to make the branches cadence and rhythm as far as possible, so that our so-called lines can better reflect the sense of beauty.
- Next

How to cut geraniums
Recently, the editors' potted geraniums began to bloom again. Due to the continuous high temperature, the editors lost many valuable geranium varieties, and of course, many potted friends' potted plants also suffered heavy losses. Well, you'd better not complain about it. After all, this is the age of relying on heaven for a living.
Related
- Fuxing push coffee new agricultural production and marketing class: lack of small-scale processing plants
- Jujube rice field leisure farm deep ploughing Yilan for five years to create a space for organic food and play
- Nongyu Farm-A trial of organic papaya for brave women with advanced technology
- Four points for attention in the prevention and control of diseases and insect pests of edible fungi
- How to add nutrient solution to Edible Fungi
- Is there any good way to control edible fungus mites?
- Open Inoculation Technology of Edible Fungi
- Is there any clever way to use fertilizer for edible fungus in winter?
- What agents are used to kill the pathogens of edible fungi in the mushroom shed?
- Rapid drying of Edible Fungi

