The method of matching stone for calamus bonsai
Acorus calamus in the wild is usually accompanied by stones, which looks very interesting. Therefore, as a bonsai of calamus, it is more enjoyable and interesting than the potted plant of calamus alone. The calamus itself has fine leaves, green hair and green green, while the matching stone has rugged rocks, vertical and horizontal gullies, and ancient charm. Between the two, the contrast between Lingxiu and sincerity, vitality and vigor, harmony and tension, in the square inch to see the world.
Since the stone matching of calamus is of such great significance, how to match the stone for calamus? Before matching stones, we first need to prepare all kinds of tools and materials we need. As long as we are fully prepared, we can handle them calmly and deal with them calmly in the course of operation. Then the production of calamus bonsai is based on appreciation and artistry.
First, prepare materials
We should prepare all the materials in advance, including flowerpot, pot soil, calamus, stone, shovel, small scissors and so on. These are the main materials. As for what else you need, prepare as much as possible according to your preferences and needs.
2. Planting in pots
Before putting on the pot, we need to put bark or other similar material on the drain at the bottom of the flowerpot. On the one hand, it can filter the water, on the other hand, it can prevent the basin soil from flowing out with the current. After laying a layer of matrix with larger particles, such as volcanic rock, red jade soil and so on, it can better improve the drainage effect in the basin. After completing this step, cover with a layer of culture soil.
1. Put in the plant
Next, the prepared calamus seedlings will be placed upright on the culture soil in the basin, and we should also take into account the position of the stone in the operation of placing the plant. Therefore, we generally need to put the plant on the left or right position in order to make enough space for the stone.
2.Placement of stone
After finishing the process of potting the calamus seedlings, we can put stones for them. The stone should be placed as close to the plant as possible, so that the calamus and the stone should be connected as much as possible. Of course, when placing stones, the position can also be adjusted properly, but the principle is to improve the ornamental quality and coordinate with the environment at the same time. In order to achieve the best display effect, we might as well put it from multiple angles.
3. Cover the soil
After determining the best posture of calamus and stone, we should cover the basin soil in time, and the depth of the soil should be completely covered with the root system of the plant. But it is important to note that this time the soil is covered after the plant and the stone are placed at the same time, and we cannot cover the soil alone. In particular, we should use the way of "planting stone" to make the stone grow out of the soil, so that it looks more natural and vivid, and we cannot simply put the stone on the soil. And when covering the soil, it is recommended to pour the soil, while stirring the soil with tools to reduce the gap, so that the basin soil is in full contact with plants and stones as much as possible.
3. Laying moss
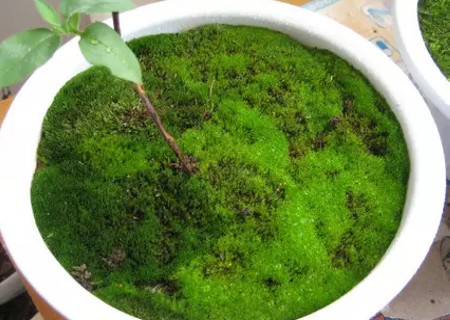
Moss is an important element in making calamus bonsai, because if some moss is laid in the right place, the whole bonsai will look more natural, but it will make it more difficult to maintain. When laying moss, you must let it hold the stone naturally, not let it protrude or form its own body. Laying moss scientifically and reasonably not only makes bonsai look natural and wild, but also improves the ornamental and artistic charm of bonsai.
Fourth, watering and placing
After potting the plant and arranging the stone and moss, we need to water it once. As calamus is a wet plant, so watering must be sufficient and sufficient. After watering, move the bonsai to a cool and well-ventilated environment for about a week, wait until the calamus seedlings take the pot smoothly and be more harmonious with stone and moss, then you can transfer to the normal maintenance and management process.
Time: 2019-05-25 Click:
- Prev

The method of making bonsai of white orchid
White orchid, also known as yellow orchid, usually we see a tree shape as high as, but this kind of tree also has short varieties, and can also bloom and color as white as snow, if the temperature is suitable, it will remain in bloom for a long time, fragrant and beautiful. White orchid bonsai has beautiful trees, emerald green leaves, snow-white flowers and fragrance like orchids.
- Next

Making diagram of bonsai moss
Since entering modern society, with the improvement of people's civilization and the increasing demand for spiritual food, bonsai has become an important part of more and more people's lives. Because raising some bonsai at home can not only improve people's taste, but also decorate the environment.
Related
- Fuxing push coffee new agricultural production and marketing class: lack of small-scale processing plants
- Jujube rice field leisure farm deep ploughing Yilan for five years to create a space for organic food and play
- Nongyu Farm-A trial of organic papaya for brave women with advanced technology
- Four points for attention in the prevention and control of diseases and insect pests of edible fungi
- How to add nutrient solution to Edible Fungi
- Is there any good way to control edible fungus mites?
- Open Inoculation Technology of Edible Fungi
- Is there any clever way to use fertilizer for edible fungus in winter?
- What agents are used to kill the pathogens of edible fungi in the mushroom shed?
- Rapid drying of Edible Fungi

