Grafting methods and techniques of apricot trees
1. Grafting time
The main results are as follows: 1. Spring grafting can be grafted during the period from thawing in early spring to rootstock germination, but different grafting methods should be selected according to the state of rootstock peeling: before rootstock peeling, many methods can be used, such as split grafting, cutting grafting, ventral grafting, tongue grafting, xylem bud grafting and so on. The rootstock can also be grafted by skin insertion and T-shaped bud grafting after peeling.

2. Xia Li grafting, also known as green branch grafting, often uses split grafting, cutting grafting and bud grafting, generally from mid-June to the end of August, but the survival rate is the highest from mid-June to mid-July.
3. The grafting time in autumn is generally carried out from mid-September to early October, and it is mostly used in the warm winter areas south of the Yangtze River to seal the interface, which can reduce water loss as much as possible and improve the survival rate. In the north, due to cold and dry, budding is easy to die from freezing injury, so autumn grafting is generally not used.
2. Commonly used grafting methods
1. Branch grafting includes split grafting, cutting grafting, ventral grafting, tongue grafting, skin-wiping tongue grafting and so on.
(1) splicing
Splicing is easy to operate and can be used in spring, summer and autumn.
The cutting scion is cut with a sharp knife on both sides of the 0.50cm under the scion bottom bud, the cutting surface has been wedge-shaped, the budding side is slightly thicker, about 3~4cm, and the cutting surface is smooth and smooth.
The grafting site of the shearing stock is selected, the rootstock is cut or sawed, and the incision is cut down through the pulp heart of the rootstock on the smooth side of the bark, and the cut length is slightly longer than that of the scion.
Insert the scion with the left thumb against the cut and hold the rootstock tightly, and the right hand holds the scion slowly into the incision of the rootstock. At this time, the thumb should gradually slide down with the scion, so that the cambium of the scion and the rootstock closely match. In order to accelerate healing, the scion rubbing surface does not need to be fully inserted, leaving the 0.30cm long cutting surface exposed outside the rootstock, that is, the so-called "upper white, lower hollow, cambium alignment is successful".

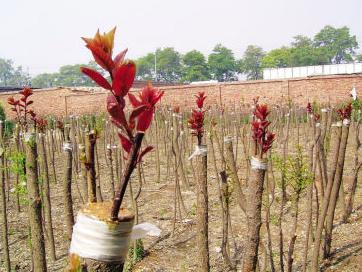
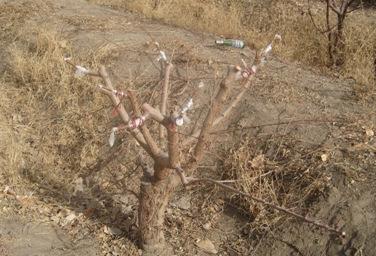
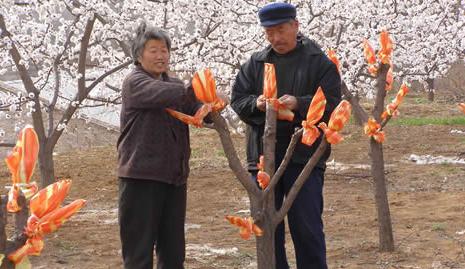
The thin plastic film tape with the same cut width as the rootstock is selected. First, wrap the interface around the interface for two times, tighten the interface, and then close the upper mouth. After all the sockets are closed, they are tied down and tied together, all the way around the cut seam. The advantage of this method is to avoid bleeding and soak the lower end of the scion in the bleeding fluid, which is beneficial to the survival of the scion. At the same time, after the scion survives, with the thickening of the rootstock, the plastic film is slowly elongated, and the phenomenon of "bee waist" does not appear without loosening.
(2) splicing
The scion is cut into two cutters. One knife is a long cutting surface and one knife is a short cutting surface. One cutting method is to use a sharp knife to lengthen the cutting surface of 3cm at the 0.50cm on the back of the scion bottom bud, and the other is to cut the knife inward at 300 angles to the scion thickness 1 inch 2 5, and then cut the edge vertically, the length is also 3cm. The short cutting surface is the 0.80~1cm long short cutting surface under the scion bottom bud.

Cut the rootstock and insert the scion on the rootstock, select the appropriate grafting part to cut dry, flatten the cut, select the side with smoother bark, cut vertically down from the upper section, the length is roughly equal to the cutting surface of the scion, insert the scion into the incision, the long cutting surface is close to the xylem of the rootstock, and the short cut faces outward. Make sure that the cambium on both sides of the long cutting surface is aligned and tight with the cambium on both sides of the rootstock cut.
(3) abdominal junction. Ventral grafting, also known as "waist grafting", is not cut stock branch grafting method, mostly used for ginkgo biloba tree grafting pollination male branches or fill crown defects. First, the long cutting surface of a long 2~2.50cm is cut at the lower end of the scion, and the short part is as deep as 2CP3 of the ear diameter, and then a short cutting surface of the longer cutting surface and the short 0.50cm is cut on the back. The grafting part of the rootstock is cut into a flat oblique incision, which is as deep as 1 beat 3 of the xylem, and its length is equal to that of the cutting surface. When inserting, the forming layer on one side should be aligned and tightly connected. Then tie it with plastic strips and cut the anvil after survival.
(4) double tongue connection. It is mostly used for rootstocks with a diameter of about 1cm, and scions and rootstocks are roughly the same in thickness. This method has the advantages of cross-docking between scions and rootstocks, increasing cambium contact surface, tight and firm joint, not afraid of wind and shaking, and high survival rate. It is a commonly used grafting method in production at present.
Cut the scion on the back of the bottom bud of the scion, first cut a slope of about 3cm, and then split a notch of about 1cm upward from the bottom of the slope at the bottom of the slope, showing a tongue-like shape.
The rootstock is cut at the appropriate part of the rootstock, and then cut into a 3cm-long slope on one side, and then split a cut about 1cm from the top of the slope from top to bottom, showing a tongue-like shape. So that the two oblique tongue positions of the anvil and ear can correspond and bite each other.

The scion inserts the scion split down into the split of the rootstock, so that the tongue of the rootstock and the ear cross, aim at the cambium, bite each other, and then bind.
(5) wiping skin. This method does not limit the thickness and can be used for large and small rootstocks. This method can be used within one week from the beginning of sap flow in spring to the sprouting of rootstocks. It is often adopted because of its long application time.
The scion cuts the slope of the long 3~4cm downward at the back 0.50cm of the lower part of the bottom bud, and lengthens the slope of the 0.50cm at the lower end of the other side, and then gently cuts one knife on each side of the short slope to form a spire, and then cuts one knife on each side of the long slope so that only the skin is removed. Expose the part of the cambium.
2. Bud grafting mainly includes embedded bud grafting, T-shaped bud grafting and square bud grafting and so on.
(1) square bud grafting. Most of the buds were grafted with 3-4-year-old shoots. At the upper and lower 1cm of the bud and about 0.50cm on both sides, cut 1 knife horizontally and longitudinally, reaching to the xylem. Use the knife to carefully remove the bud (without xylem) and try to moisturize and prevent water loss. Select the appropriate part of the rootstock, according to the size of the scion bud piece, take out the rootstock bud piece with the same method, and then stick the scion bud piece to the rootstock bud eye. When pasting the bud, make sure that the bud piece is aligned with the rootstock bud axis, and then tie it tightly.
(2) T-shaped budding. This method is generally used after the rootstock is peeled in spring or in autumn in September. First, cut 1 knife longitudinally at the 1cm below the bud, deep into the xylem, then cut 1 knife across the 1cm above the top of the bud, and remove the bud with a little xylem. Then select the appropriate part of the rootstock, in a "T" shape, first cut 1 knife horizontally, then cut 1 knife longitudinally, reach to the xylem, gently pick the bark from the cut seam with the knife, insert the bud, align the upper cambium, tie it tightly with a plastic bag, and expose the bud eye.

(3) embedded bud method. This method is similar to square bud grafting, except that the bud piece has xylem. Cut 1 knife horizontally at the 1cm below the base of the bud, as deep as 1 beat 3 of the xylem, and then cut down longitudinally at the 1cm above the bud, take off the bud and bring as much xylem as possible. Select the appropriate part of the rootstock, cut out an incision equal to the size of the bud, put the bud into the incision of the rootstock, aim at the cambium, tie it tightly with a plastic bag, and expose the bud eye.
The above is the apricot grafting introduced by the editor.
The scion inserts the scion split down into the split of the rootstock, so that the tongue of the rootstock and the ear cross, aim at the cambium, bite each other, and then bind.
(5) wiping skin. This method does not limit the thickness and can be used for large and small rootstocks. This method can be used within one week from the beginning of sap flow in spring to the sprouting of rootstocks. It is often adopted because of its long application time.
The scion cuts the slope of the long 3~4cm downward at the back 0.50cm of the lower part of the bottom bud, and lengthens the slope of the 0.50cm at the lower end of the other side, and then gently cuts one knife on each side of the short slope to form a spire, and then cuts one knife on each side of the long slope so that only the skin is removed. Expose the part of the cambium.
2. Bud grafting mainly includes embedded bud grafting, T-shaped bud grafting and square bud grafting and so on.
(1) square bud grafting. Most of the buds were grafted with 3-4-year-old shoots. At the upper and lower 1cm of the bud and about 0.50cm on both sides, cut 1 knife horizontally and longitudinally, reaching to the xylem. Use the knife to carefully remove the bud (without xylem) and try to moisturize and prevent water loss. Select the appropriate part of the rootstock, according to the size of the scion bud piece, take out the rootstock bud piece with the same method, and then stick the scion bud piece to the rootstock bud eye. When pasting the bud, make sure that the bud piece is aligned with the rootstock bud axis, and then tie it tightly.
(2) T-shaped budding. This method is generally used after the rootstock is peeled in spring or in autumn in September. First, cut 1 knife longitudinally at the 1cm below the bud, deep into the xylem, then cut 1 knife across the 1cm above the top of the bud, and remove the bud with a little xylem. Then select the appropriate part of the rootstock, in a "T" shape, first cut 1 knife horizontally, then cut 1 knife longitudinally, reach to the xylem, gently pick the bark from the cut seam with the knife, insert the bud, align the upper cambium, tie it tightly with a plastic bag, and expose the bud eye.

(3) embedded bud method. This method is similar to square bud grafting, except that the bud piece has xylem. Cut 1 knife horizontally at the 1cm below the base of the bud, as deep as 1 beat 3 of the xylem, and then cut down longitudinally at the 1cm above the bud, take off the bud and bring as much xylem as possible. Select the appropriate part of the rootstock, cut out an incision equal to the size of the bud, put the bud into the incision of the rootstock, aim at the cambium, tie it tightly with a plastic bag, and expose the bud eye.
The above is the apricot grafting introduced by the editor.
Related
- Wuhan Hospital Iron Tree Blooming Result Was Instantly Frightened by the Gardener Master
- Which variety of camellia is the most fragrant and best? Which one do you like best?
- What is the small blue coat, the breeding methods and matters needing attention of the succulent plant
- Dormancy time and maintenance management of succulent plants during dormancy
- Minas succulent how to raise, Minas succulent plant pictures
- What are the varieties of winter succulent plants
- How to raise succulent plants in twelve rolls? let's take a look at some experience of breeding twelve rolls.
- Attention should be paid to water control for succulent plants during dormant period (winter and summer)
- Watering experience of twelve rolls of succulent plants
- Techniques for fertilizing succulent plants. An article will let you know how to fertilize succulent plants.


