The propagation method of Dahlia tuber root?
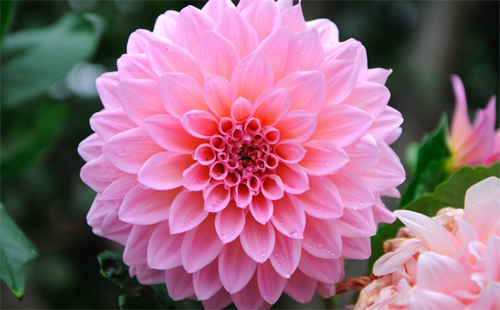
According to the propagation method of Dahlia tuber root, Dahlia is tall, changeable, colorful and elegant, which is not only an important bulb flower for flower bed, flower border, courtyard and potted plants, but also a good material for fresh cut flowers. The double dahlia with high ornamental value is often propagated by its fusiform tuber root because it is extremely difficult to obtain seeds.
Winter storage: in relatively cold areas, if the fleshy root of Dahlia is not dug up and stored indoors, it is very easy to cause root rot by freezing. Usually in late autumn and early winter, when the aboveground part withered, the root tuber was dug up and cut at 5-8 cm from the base of the stem. The Reed head at the upper end of the root should not be hurt. Spread out for 3 to 5 days, pay attention not to freeze, wait for the root to soften slightly, then put it on the indoor soil floor. The root end of the Dahlia block stands upward, arranged neatly in a single layer, and then covered with slightly damp sand.
The injured root of Dahlia should be smeared with charcoal powder or clean plant ash to prevent decay; the indoor temperature should be kept at 3: 5 ℃ in winter. The sandy soil used for storage should not be too dry so as not to dry up the bud eyes, nor should it be too damp to avoid decay. During storage, if moldy roots are found, they should be removed in time.
Hoarding buds in early spring: the roots of dahlias hidden in winter are placed in the greenhouse or on the humus soil in the open field in February of the next spring. The roots are arranged at regular intervals, covered with wet sand or rotten leaf soil, leaving only the root neck outside the soil. Outdoor buds should also be covered with plastic film to protect against cold and moisturize, spray water every day, and sprout after 15 days. When the buds on the head of the Reed grow to 2cm or 3cm, they can be divided and planted.
Division and planting: the root clump of Dahlia flower after hoarding buds has more buds on its Reed head. Cut the root tuber from the root neck with a sharp knife, so that each root has 1-3 buds, which can be planted in flower beds or flowers, and can also be used for pot planting. Generally, 1-3 roots are planted in each hole, and the buds on Reed head should be exposed outside the soil when covering the soil. In case of "late spring cold" attack, rice straw can be covered on the planting hole to prevent root tuber and bud damage. The above is the introduction of the propagation method of Dahlia root tuber.
When will the root planting method of Dahlia be planted?
Dahlia flowers that are big, is very good-looking, is very popular, Dahlia planting is generally root planting, to see how Dahlia root planting method is? When is the best time to start planting Dahlia tubers:
Prepare tools and materials:
Spade, small pruning knife, pillar, watering pot with shower head, nutrient fertilizer with slow fertility release, etc.
Time selection:
In April, once the earth starts to warm up again, take out the dahlia roots stored in the storage room (if you buy them that year, try to choose healthy and fat roots).
1. Remove dry roots, and if there are too many tuber roots (split them with a small pruning knife), pay attention to leaving adventitious buds and some lateral roots on each rhizome.
2. Dig-dig a pit about 20cm deep, loosen the soil, and remove boulders and weed roots. If the soil has a high sand content, cultivate it with soil compost or compost.
3. In order to provide the nutrition especially nitrogen fertilizer that Dahlia needs in the future, add slow-release fertilizer while weeding the soil, and pay attention to apply fertilizer according to the quantity on the product description.
4. In order not to damage the tuber root, set up before the Dahlia peanut root-the pillar is in a pit about 15cm deep. Place the bulb flat at the bottom of the pit with the bud close to the pillar.
5. Fill the pit with broken soil. In order to make the bulbs come into full contact with the soil, gently flatten the pit with your feet, and then water it thoroughly like a light rain.
II. Setting up pillars and pruning
In July, dahlias planted at the beginning of spring are springing up like bamboo shoots after a spring rain. It's time to set up pillars, if not at the time of planting. In order to cultivate large and beautiful flowers, it is recommended to carry out cutting.
6. Set up a pillar at the foot of each dahlia before the rhizome is overwhelmed by the weight of leaves and flowers. Be careful not to break the bulbs.
7. The pillar had better leave the rhizome 5cm and tie the rhizome and strut loosely with plastic or wine coconut leaf fiber rope.
Note: don't pull the roots and pillars too tight.
8. in order to cultivate large flowers, use a sharp small pruning knife to eliminate the leaf axils growing under the leaves, leaving only the buds growing on the rhizome. At the same time, eliminate small side branches.
9. Short dahlias do not need to set up pillars, and clumps of branches and leaves can support flowers. However, in order to prevent bolting and reduce the burden of bulbs, attention should be paid to the timely elimination of withered flowers. Timely elimination of withered flowers can also effectively promote the production of new buds.
Management after March and October
In October and October, when the Dahlia season is over, use trimming or sharp scissors to cut off all the root branches at the 10cm. Don't touch the leaves, except for the withered leaves, of course.
11. Wait until the plant has withered completely before pulling out the dahlias. If pulled too early, it may seriously damage its storage and affect future reproduction.
12. When the plant has withered completely, use a long-handled fork shovel, pull it out carefully, and be careful not to destroy its roots.
13. After drying in the open air for several hours, remove the soil and dead leaves from the bulbs, cut off the excess root branches (keep about 5cm), write down the name and color, and tie the label.
14. Store them in a wooden box in a dry and ventilated place. If you are afraid of erosion, you can store them in a net bag and hang them up. Pay attention to regularly observe their health status.
15. In places where frost and ice are rare, the Dahlia bulb can be left in the ground. Cut off all withered branches and leaves from the 5cm above the ground. Cover with 20-30cm thick dry leaves or straw.
IV. Harvesting and storage of Dahlia tuber roots
Dahlia is not cold-resistant, mainly because the root tuber can not be frozen, Dahlia root at 0. Dormancy begins at 5 ℃ and frostbite occurs when the temperature is below 0 ℃, so it is impossible to overwinter in open field in North China, and tubers should be harvested before the early frost.
After frost, the plants and leaves withered and withered. The stems and leaves of the aboveground parts should be cut off immediately and the roots should be dug out. Potted plants can be removed from the pot or even put into the greenhouse for storage. The varieties should be checked and selected before harvest to ensure the purity of the varieties.
Note:
Before storage, the withered stems and leaves should be cut off about the 15cm from the root neck. In order to prevent sprain of the root neck (the future sprouting part), the root tuber should be dug out the whole pier.
After digging out the root, dry it in the sun for 3 days before collecting it. In order to prevent frost at night, the roots can be covered with Reed curtains or straw. Waiting
After the soil on the root is dry, shake off the soil, classify it by variety, tie the sign, and put it in a greenhouse with a temperature of not more than 5 ℃. At this time, keeping a constant temperature of about 3-5 ℃ and preventing excessive temperature is the key to preserving the root, because too high will make the foot buds in the neck of the root germinate ahead of time, consume water and nutrients, and affect the bulb, while too low will cause the bulb to rot.
5. Disinfection and sterilization
In addition, the storage place should be sterilized. When setting, the root neck is placed upward on the floor of the greenhouse. In order to prevent premature germination and heat of rotten roots, it is generally beneficial to stack 3-5 layers and bury them with slightly wet sand.
During winter storage, it is necessary to check regularly and cut off the rotten and useless roots in time. If you find that the sand is too dry, do not water the root directly. After taking out the root tuber, spray the sand and wet it to the degree of moisture, and then bury the root again. In addition, the withered stems and leaves of potted plants can also be cut off, and the original pot can be placed in a greenhouse with a temperature of no more than 3-5 ℃ to stack up the pots and avoid direct light.
During storage, if the basin soil is too dry, it can be watered a little (the amount of water must not be too large) to keep the soil slightly moist to avoid root rot. This method is simple, but it takes up a large storage area. Another method of storage is to divide the dried roots together with the adventitious buds growing on the root neck.
After division, the cut is coated with plant ash, packed in a wooden slot or wooden box, and filled with dry sand or sawdust between the pores. Then the wooden trough or wooden box was stored under the condition of 3: 5 ℃ with good ventilation and no direct light. Do not reverse during storage. This method is not only easy to keep, but also convenient to use, and can save the storage area.
The root tubers of some varieties of dahlia are difficult to store, such as lotus chrysanthemum, honeysuckle and so on. When storing the tubers of these varieties, do not mix them with other tubers. The dried root can be placed in a wooden box or flowerpot. The root can be covered with a small amount of dry sand and stored under the condition of 3-5 ℃.
A few days before the arrival of the frost period, the potted dahlia can be moved into a greenhouse of 5: 10 ℃, and the flowers and buds can be removed and cultivated for about 15 to 20 days. After the nutrients are fully concentrated in the root tuber, the stems and leaves on the plant can be removed and stored in the original pot or out of the pot.
This is the end of the Dahlia root planting method. If you really like it, plant one quickly.
Harvesting and storage of Dahlia root tuber
Dahlia is not cold-resistant, mainly because the root tuber can not be frozen, Dahlia root at 0. Dormancy begins at 5 degrees Celsius and frostbite occurs when the temperature is below 0 degrees Celsius, so you cannot overwinter in the open field in North China, and the roots should be harvested before the early frost.
Plants and leaves wither and wither after frost. At this time, the stems and leaves of the aboveground parts should be cut off immediately and the roots should be dug out. Potted plants can take off the pot or even pot it into the greenhouse for storage. The varieties should be checked and selected before harvest to ensure the purity of the varieties. Before storage, cut off all the withered stems and leaves about 15 cm from the root neck. In order to prevent the root neck from being sprained (where it will sprout in the future), the root tuber should be dug out the whole pier. After digging out the root, dry it in the sun for 3 days before collecting it. In order to prevent frost at night, the roots can be covered with Reed curtains or straw. After the soil on the root is dry, shake off the soil, sort it by variety, tie the sign, and put it in a greenhouse where the temperature is not more than 5 degrees Celsius. At this time, maintaining a constant temperature of about 3-5 degrees Celsius and preventing excessive temperature is the key to preserving the root, because too high will cause the foot buds in the root neck to sprout ahead of time, consume water and nutrients, and affect the bulb, while too low will cause the bulb to rot by freezing.
In addition, the storage place should be sterilized. When setting, the root neck is placed upward on the floor of the greenhouse. In order to prevent premature germination and hot rotting roots, it is beneficial to stack 3-5 layers and bury them with slightly wet sand.

During winter storage, it is necessary to check regularly and cut off the rotten and useless roots in time. If you find that the sand is too dry, do not water the root directly. After taking out the root tuber, spray the sand and wet it to the degree of moisture, and then bury the root again.
In addition, the withered stems and leaves of potted plants can also be cut off, and the original pot can be put into a greenhouse at a temperature of no more than 3-5 degrees Celsius to stack up the pots and avoid direct light. During storage, if the basin soil is too dry, it can be watered a little (the amount of water must not be too large) to keep the soil slightly moist to avoid root rot. This method is simple, but it takes up a large storage area. Another storage method is to separate the dried roots, together with the adventitious buds growing in the neck of the roots. After division, the □ is smeared with grass ash, packed in a trough or box, and filled with dry sand or dust between the pores. Then store the trough or box at 3-5 degrees Celsius with good ventilation and no direct light. Do not reverse during storage. This method is convenient for storage, convenient for access and use, and can save storage area.

- Prev
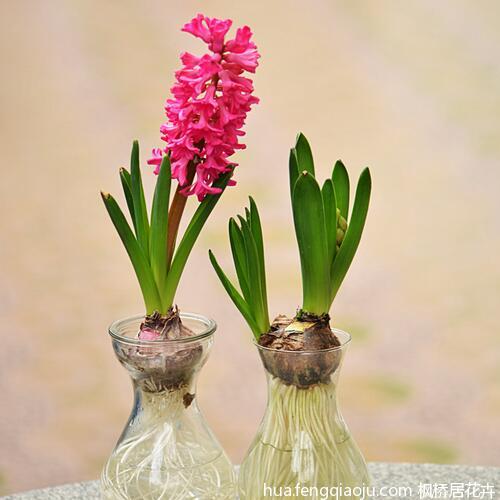
How do hyacinths grow in water?
Hyacinth how to raise water, hyacinth also known as foreign daffodils, colorful daffodils, its colorful, dazzling, and pleasant fragrance, both suitable for potted plants, but also adapt to hydroponics, deeply loved by people in recent years. Water-raised hyacinths without artificial low temperature treatment can be carried out in early November, and special glass bottles should be selected.
- Next

Planting technique of bergamot
Bergamot planting technology, bergamot is mainly potted, and the southern courtyard can be planted on the ground. Plant or change pots and soil before germination in spring. The basin soil is mostly made of weathered pond soil or rotten leaf soil, and the mature chicken manure, garden soil and river sand can also be used to prepare the culture soil according to the proportion of 4:3:3. If you plant in a new pot
Related
- Fuxing push coffee new agricultural production and marketing class: lack of small-scale processing plants
- Jujube rice field leisure farm deep ploughing Yilan for five years to create a space for organic food and play
- Nongyu Farm-A trial of organic papaya for brave women with advanced technology
- Four points for attention in the prevention and control of diseases and insect pests of edible fungi
- How to add nutrient solution to Edible Fungi
- Is there any good way to control edible fungus mites?
- Open Inoculation Technology of Edible Fungi
- Is there any clever way to use fertilizer for edible fungus in winter?
- What agents are used to kill the pathogens of edible fungi in the mushroom shed?
- Rapid drying of Edible Fungi