Rapid technique of potted plant by cutting old branches of Prunus delavayi
In addition to high-pressure planting, bonsai piles can also be cultivated by old branch cuttings, and have the following advantages: first, the scenery is fast, the selected branches are cut directly into the pot, and after growing branches and leaves, they can be trimmed and tied. Under normal circumstances, the autumn "Xiaoyangchun" cutting, the following year can become a scene out of the nursery; the scene pile branch strip shape, early spring cutting, late autumn can also blossom into a scene out of the nursery. Second, the utilization rate of mother trees is high, especially the branches and mother trees that have been abandoned due to heavy pruning and other reasons, large and small branches can be used to turn waste into treasure, which can not be achieved by high-pressure breeding.
In this paper, the key points of the rapid cultivation techniques of the old branch cuttings of Prunus mume are summarized as follows:
(1) cutting time: cuttings can be cut in spring, summer and autumn, and cold protection should be paid attention to in late autumn.
(2) cut and deal with the branches of the scene pile: according to the conception, cut off the unnecessary branches in advance. Fix the green shape of the scene pile, take it off with a saw or knife, the cut should be slanting and slippery, and the length of the pile branch should be used as needed. The length of the branch of the pile should be determined according to the need, tens of centimeters in short and lm-2m in length. Because it is an old branch and very long, it is difficult to take root, so it is better to use root promoter to treat it. Through the experiment, the base of the pile branch was soaked in the 100PPM aqueous solution of mononaphthalene acetic acid, ABTI and No. 2 rooting powder, and then cut in the pot two hours later. The rooting was early and the root system was developed, which could improve the survival rate and shape out of the nursery earlier.
(3) on the basin: choose ordinary sandy loam or sand with good permeability and organic fertilizer in the proportion of 2 to 1, 1 to 3 to 1, to directly basin the branches of Jingzhu treated with root promoter, compacting, watering and shading. If the pots on the branches of the pile are unstable, they should also be fixed on the bracket.
(4) Management: do not water too frequently to avoid stagnant water and rotten branches in the basin and keep the soil moist. After growing leaves, you can often spray water to the leaves. After taking root, enter the normal water pipe. The roots treated with root promoters take root for more than one month, and those without treatment take root for about 3 months. When the Jingzhu branches first take root, 0.2% urea and compound fertilizer should be sprayed to the leaves to promote the synchronous growth of the aboveground and underground parts. When the root system is fully developed and enters the normal fertilizer tube, more phosphate fertilizer or compound fertilizer should be applied to promote early flowering and more flowering.
(5) modelling: the old branches of Prunus mume can sprout and grow leaves by using the nutrients stored in the body and the water absorbed through the branches for photosynthesis. Therefore, it is usually the first to grow branches and leaves, and then to root. After the new branches grow, they can be trimmed and tied according to the pre-conceived bonsai shape until they are formed out of the nursery, instead of having to wait until the root system is fully developed.
When is the best month for triangulated plum cutting, the method of triangulated plum cutting / March cutting is in place in 4 steps.
The beauty of triangular plum does not need to be described too much. People should be impressed by the beauty of triangular plum. Its green leaves and bright colors are really beautiful. In addition to beauty, triangular plum has many effects and functions, so it is multiplied in large numbers. As for the cuttage commonly used in the propagation of triangulated plum, in which month is the cuttage best? The following is the editor to bring you a very detailed triangulated plum cutting method.
First, triangulated plum cutting is the best in which month, from March to June.

The propagation methods of triangular plum are cutting, high pressure and grafting, but the most convenient one is undoubtedly cutting, but if you want to have a high survival rate of cutting, the choice of time is very important. As for when the cuttage of Prunus mume is the best, according to the personal experience of the majority of flower friends, it is concluded that it is appropriate to take root from March to June, the general temperature is about 25 ℃, and it can take root in about 30 days.
Second, the cutting method of Prunus mume
Materials: a flowerpot, a bottle of rooting water
1. Cuttings selection
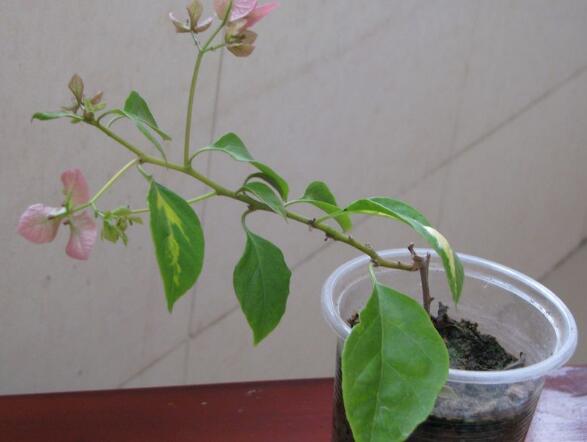
Triangular plums are poisonous and have thorns on the branches, so it is best to wear gloves when taking cuttings. Cuttings are generally cut off from the sunny branches, the new branches had better bring some old branches, leave a few leaves at the top, and cut off the rest. If everyone is not in the best time to cut, but after June, then we have to choose semi-lignified new branches as cuttings.
Cuttings treatment: after selecting cuttings, we still have to carry out some treatments. Soak the base of the cuttings in rooting water for a period of time.
2. Cutting substrate
Before cutting triangulated plum, the substrate needs to be prepared. According to the growth habits of Prunus mume, its cutting substrate is commonly used: River sand, vermiculite, perlite, plain sand soil, peat soil, flower mud and so on. As far as the editor is concerned, it can be a little simpler, just choose Susha and perlite. Then pour the matrix into the flowerpot.
Soil selection: after the matrix is poured into the flowerpot, we still have to spread a layer of 7-8 cm of soil on it. As for soil selection, nutrient soil containing humus, loose and well drained can be selected according to the requirements of soil in the culture method of triangulated plum.
3. Triangulated plum cuttage begins
Get ready for the above, triangulated plum cuttage can be officially started. First of all, insert the cuttings into the basin soil to expose the leaves above. Pay attention to the distance between the cuttings. Don't be too dense. After the cuttage of Prunus mume is finished, cover the flowerpot with a layer of plastic film, and use needles to insert some holes in the film in order to breathe, pay attention to the distance between the holes.
After that, move the flowerpot to a place where there is light, but not in direct sunlight. Then spray a little water on the cling film to keep the cling film moist and let the triangular plum absorb water better. After the above steps, the triangulated plum cutting is basically completed, followed by the later maintenance.
4. Maintenance and management
The maintenance of triangulated plum after cutting is also very important. About 5-7 days after the cuttage is finished, you can uncover the cling film once to let the triangular plum breathe. Then observe the humidity of the basin soil, if dry, water properly, and spray fog on the branches and leaves every time. About 30 days, triangulated plum can take root, at this time everyone to completely open the transparent film normal maintenance!
With regard to the method of cutting propagation of triangular plum, the editor has introduced this. Although there are still grafting and high pressure methods for breeding triangular plum, what is most suitable for flower friends is still cutting. So if you want to make more than one pot of triangular plum at home, try it with the above method. This is the right time. If you miss it, you have to wait for another year.
The Diagram of pruning and Cuttage grafting techniques of Prunus mume
I believe that many people have raised triangular plums, hoping to get exquisite bonsai by doing it themselves. If you want to get a beautiful triangular plum bonsai made by yourself, you need to master the corresponding knowledge and technology. For example: Triangle plum cutting, grafting, pruning and so on. By mastering these techniques, I believe we can get our favorite triangular plum bonsai.
Illustration of cutting method of Prunus mume
The first is the cutting method of triangular plum. The correct cuttings should be selected before cutting. It is best to use sunny branches as cuttings, both new and old branches. For cuttings, the bottom should be cut into a bevel with a knife, and the cut should not be flat; then soak with rooting powder. Next, punch the holes and bury the cuttings in the soil to expose the leafy nodes. Finally, water, cover the plastic film, and ensure air permeability and proper lighting. The basic practice can be referred to the following figure.
Diagram of grafting technique of Prunus mume
The second is the grafting method. Grafting also needs to choose the right branches and rootstocks. The best choice of scion is semi-lignified branches, which are rich in moisture and easy to survive. After the selection, it is the scion of the rootstock. First, cut the two diagonally to ensure that they can be closely combined; then wrap them in plastic or duct tape to make them tighter. Finally, attention should be paid to maintenance. Avoid the scion in the rain for a long time, and ensure proper light. I believe that after careful care, new branches will slowly grow after more than ten days. The understanding of grafting can be understood through the figure below.
Diagram of pruning method of triangular plum
Finally, how should we trim the triangular plum? Pruning branches and leaves is a technical task, which will affect whether it can grow healthily and beautifully. Pruning should be short, heavy and sparse. Its specific meaning is to cut short the horizontal branches, to re-cut the new branches, and to remove the dense branches and weak branches. As for the construction time, there are also requirements, generally the first time before germination, that is, between March and April, and then in the summer also need to pay attention to pruning to avoid too dense branches and leaves. When building, we should also pay attention to the size of the basin, the small pot should ensure that the plant will not grow too big. The branches that need to be built are dead branches, horseback riding branches, parallel branches, long branches and so on. Finally, attention should also be paid to the cuttings. It can be understood as shown in the following figure.
A complete collection of triangular plum bonsai pictures
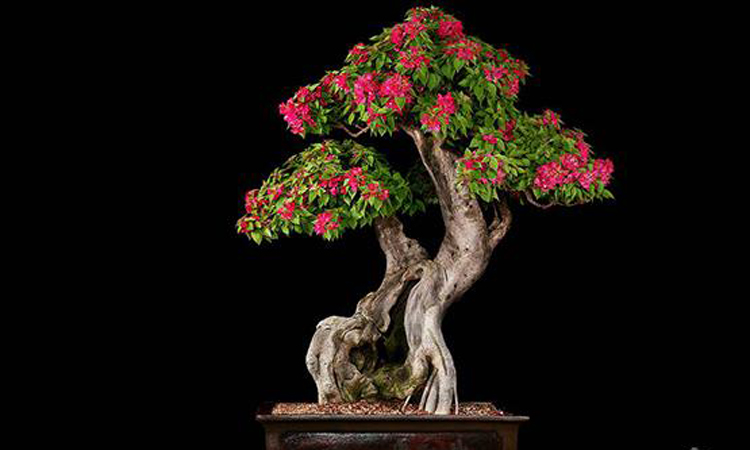
Through the understanding of triangulated plum cutting, grafting, pruning and other knowledge, I believe it can help to cultivate some exquisite triangular plum bonsai, and finally enjoy the harvest and satisfaction of do-it-yourself. Let's discover the beauty of triangular plum bonsai together.
- Prev

How to make and maintain triangular plum bonsai?
Triangular plum is also known as bauhinia and rhododendron. Its rattan stem grows rapidly, its branches are resistant to pruning, it is easy to form, and the florescence is long. In the southern region, the graceful triangular plum stump is often used to make bonsai. The axillary bud of the new branch is obvious, which is beneficial to pruning, and the old branch lurks many adventitious buds, which has strong germinating power, and can promote the adventitious bud after being cut off.
- Next

How to plant longevity flowers?
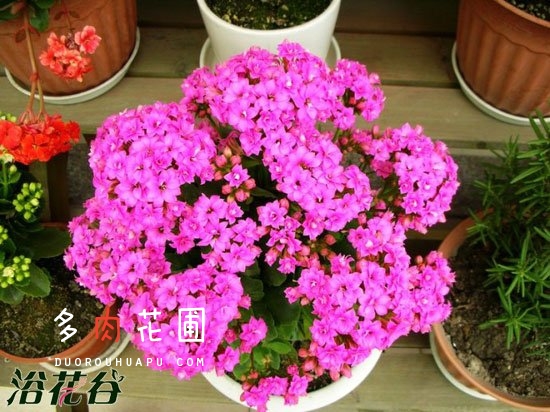
Longevity flower is a succulent plant of Sedum family, with thick and bright leaves, dwarf and evergreen plants. It blossoms in winter and spring, and the flowering period is as long as 4 months. There are many flowers, each branch can reach several flowers. It is suitable for 12-15 cm potted plants. The sex likes the warm climate, the suitable temperature for growth is 18-30 ℃.
Related
- Fuxing push coffee new agricultural production and marketing class: lack of small-scale processing plants
- Jujube rice field leisure farm deep ploughing Yilan for five years to create a space for organic food and play
- Nongyu Farm-A trial of organic papaya for brave women with advanced technology
- Four points for attention in the prevention and control of diseases and insect pests of edible fungi
- How to add nutrient solution to Edible Fungi
- Is there any good way to control edible fungus mites?
- Open Inoculation Technology of Edible Fungi
- Is there any clever way to use fertilizer for edible fungus in winter?
- What agents are used to kill the pathogens of edible fungi in the mushroom shed?
- Rapid drying of Edible Fungi

