The method of Water insertion of Gardenia jasminoides
Life always needs a little trick, water insert gardenia also need to sum up some magic skills. What is the method of inserting gardenia in water summed up by flower friends? If you want to understand, please listen to the editor explain how to insert gardenia with water one by one! I hope this method can provide some reference value for flower friends.
1. Prepare a big snow blue bottle, transparent tape and foam board.
2. Cut the big Sprite bottle like the picture with a knife and leave it unscratched.
3. Select the tender branches of Gardenia jasminoides, cut the lower end into an oblique mouth, and the upper leaves can be retained. Then fix it on the foam board as shown, and the foam board should be cut according to the size of the bottle.
4. Fill the bottle with suitable water, put the fixed gardenia foam board in the bottle, and soak the lower end of the branch in water. You can have a little more water, so you can stop adding water in the future. Then seal the bottle with scotch tape and punch a toothpick-sized hole in the bottle cap.
5. Put the bottle in a place where you can bask in the sun. If the temperature is higher, the more water droplets on the bottle wall, the easier it is to take root. Then you don't have to worry about it anymore, you just have to wait for the surprise. It begins to take root in a week or so in summer, which is really great.
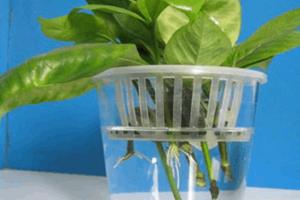
This is the water plug for 15 days, the water inserted gardenia root has grown so much, so lovely.
After the root has grown, open the transparent tape and put it in a place where the sun is not strong for a day or two, and you can fake it.
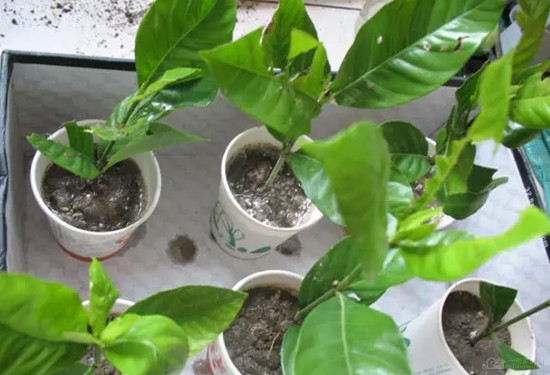
The following is the operation process of the pot, in order not to hurt the root, I first put the water inserted gardenia in the disposable cup, which is also convenient for the next transplant.
1. First punch the whole hole under the disposable cup to facilitate air permeability and drainage after planting.
2. Stick the hole you just punched with tape (some people must ask, why did you punch the hole at that time? Please continue to read), the tape should be left at the end so that it can be torn off.
3. Add 1 stroke 3 water to the cup.
4. First add a small part of the prepared fine soil to the water, so that the root will not be at the bottom of the cup, and then hold the seedling in the left hand and soak it in the water. It is estimated that the root happens to touch the soil just added, and the right hand continues to refine the soil until it is added to the desired position. When adding soil, the lower one should be fine, and the upper one can be thicker, so that the seedlings will not tilt, but you can not press the soil with your hands so as not to hurt the roots. You can gently put the paper cup on the ground for a few times to make the soil tight. Because the root is in the water when planted, it will not hurt the root when adding soil, so it will survive.
5. At this time, tear off the tape that has just been glued, the purpose is to let the excess water flow out, too much water will rot the root. If you do not punch holes at the beginning, and then come back after planting, it will make the newly planted seedlings swing again, which is not easy to survive.
Now you only need to put the planted plants in the shade and slow down the seedlings for a week without watering. Wait until the seedlings are alive, choose the soil to dry, cut the cup, and then move it to a large basin. Be careful not to destroy the soil ball. This method of putting the seedlings on the pot can ensure the smooth survival of the water-inserted branches.
The method of inserting gardenia in water is very simple, as long as you pay a little attention to it, you can transplant a new pot of gardenia. The method has been shared with you, you might as well try it!


Related
- Wuhan Hospital Iron Tree Blooming Result Was Instantly Frightened by the Gardener Master
- Which variety of camellia is the most fragrant and best? Which one do you like best?
- What is the small blue coat, the breeding methods and matters needing attention of the succulent plant
- Dormancy time and maintenance management of succulent plants during dormancy
- Minas succulent how to raise, Minas succulent plant pictures
- What are the varieties of winter succulent plants
- How to raise succulent plants in twelve rolls? let's take a look at some experience of breeding twelve rolls.
- Attention should be paid to water control for succulent plants during dormant period (winter and summer)
- Watering experience of twelve rolls of succulent plants
- Techniques for fertilizing succulent plants. An article will let you know how to fertilize succulent plants.