Teach you to easily complete the grafting of fruit trees and flowers and trees, and to master three methods easily.
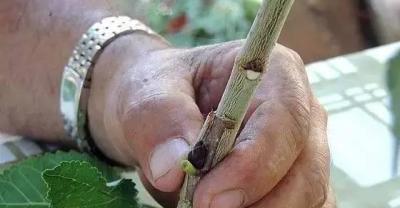
A few days ago, I had the honor to meet an old gardener and sit down to discuss the difficult problem of fruit grafting. He used mulberry trees as a demonstration to show me the grafting technique. Friends, come and learn the experience together.

Grafting is a wonderful thing. You can graft plants of the same genus, such as oranges and oranges, lemons and grapefruits, etc. They are all Rutaceae, so you can graft them together. If you want to talk about apples and oranges grafting together, you can't.
Why graft fruit trees?
For example, if you have a delicious red apple tree in your house and your neighbor has a sweet green apple tree, if you want to get the green apple tree, you can choose to cut and plant it in the yard, but if the yard space is not enough to plant two apple trees, you need to use grafting.
Graft a green apple tree onto a red apple tree, so that there are two different fruits on the same fruit tree.
Methods of grafting fruit trees:
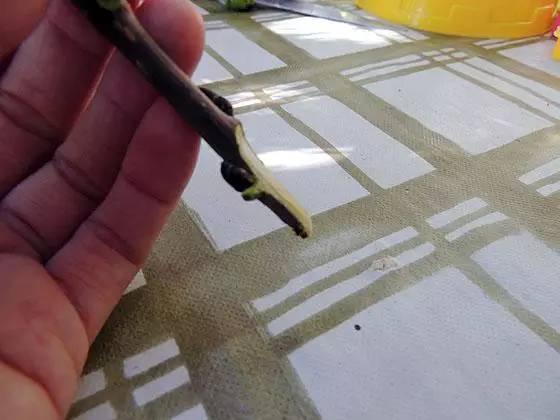
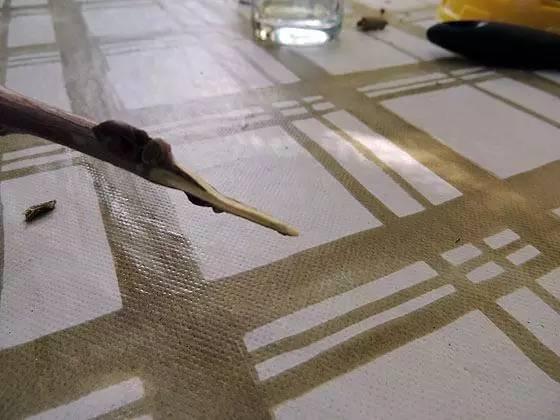
Here is a mulberry tree to demonstrate, now cut a scion, you can see that this cut is beveled, so as to increase the contact area with the grafting tree, but pay attention to the position of the bevel, otherwise it will also have an impact.
You can see that the incision above is 2~3 cm away from the growth point. The incision should be cut with sharp gardening scissors or knives. You can wipe the scissors with alcohol first.
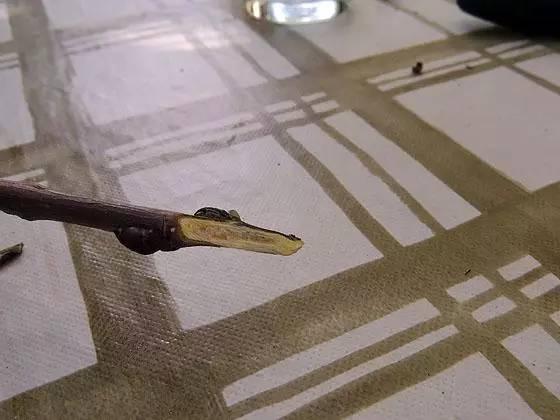
Then there is the specific grafting process. After we cut the scion, we usually have to make a cut of the same size on the tree we need to graft. This tree is called "rootstock" and we have to choose a strong plant.
Grafting tips:
When grafting, we will find that the outer edge of the incision is green bark, and the inside is white or white-green stem. What we have to do is to butt the bark of one side of the scion with the bark of the rootstock. Note that as long as the outer edge of one side is docked well, it will be half successful.
The advantage of this is that the scion and rootstock fit better, and the wound naturally heals easily. This is the same principle as the reconnection of broken bones in humans.
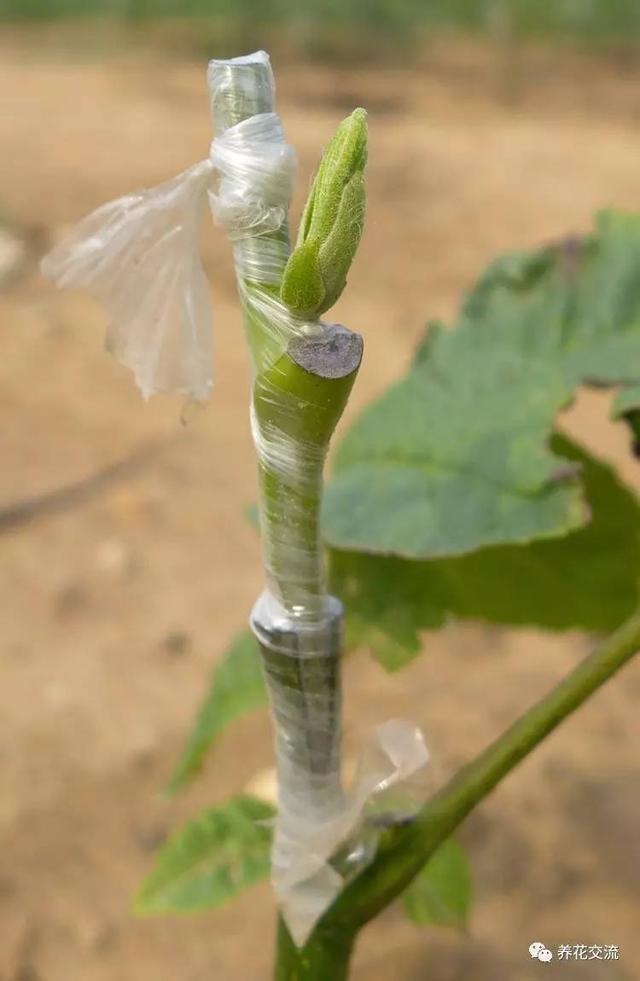
After grafting, use a grafting belt (sold in garden shops) or gauze to wrap around the grafted part. This is to maintain moisture and avoid external interference. At the same time, pay attention to the environment to shade, not to be exposed to the sun or blown by the wind.
Grafting time Note:
Of course, they couldn't graft in winter. It was always after spring that the temperature began to rise and the trees began to recover and grow rapidly. At this time, grafting was the easiest to succeed and the wounds healed quickly.
After a few weeks, when the wound is completely healed, the graft tape or gauze can be removed.
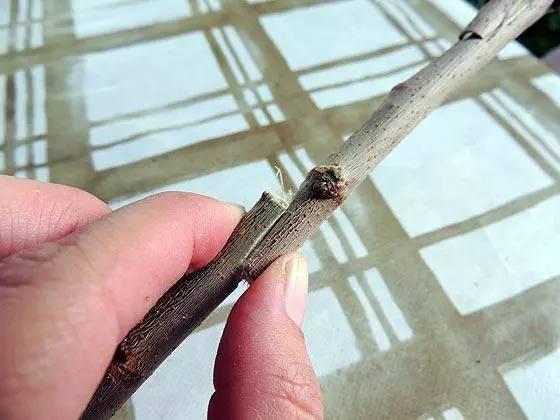
Now we continue to introduce the second grafting method. You can see that the scion in the above image is cut into a deep V-shaped incision, and the scion is chamfered on both sides to become a thin piece.
The above image shows a demonstration of a cut on a grafted tree (rootstock). Cut a distance with a sharp knife to avoid cutting too deep.
Connect the scion. At this time, pay attention to the fit of the wound. Don't leave too big a wound. Try to fit closely. The success rate will also increase. At least ensure that the outer edge of one bark can fit.
Again, we will vary the position of the incision according to the size of the rootstock. If the rootstock is large, we only need to make a cut at the edge.
exemplary diagram
After the connection, it should also be wrapped with grafting tape and gauze to avoid leakage of the wound.
Grafting Method III: Bud Grafting
The budding described below is not to graft a small bud directly onto the rootstock, but to add a procedure, let's take a look.
For the scion pictured above, cut off a small piece of scion bark along with the bud, making sure the bud is intact, cut into rectangles here.
Carefully remove the bud and prepare the scion for grafting.
If you don't want to destroy the bud, peel off the whole bark and cut a small bud scion.
This is a very good demonstration, stripping is better.
Below is the rootstock used for grafting (also selected mulberry)
You can draw a good size with a pen first, just fit is the easiest to succeed, carefully cut off and scion size of the whole bark.
Be careful when cutting the bark, try not to hurt the stem inside, and don't cut too shallow, otherwise the bark won't come off.
Cut twice horizontally, then cut vertically, and you can easily peel off the bark, revealing the white-green stems inside.
Wrap the scion bud around the bark of the grafted stock, yes, wrap it with bark, and finally wrap it with grafting tape or gauze.
Medical gauze can be used, but be careful not to cover the bud, let alone destroy the bud, it is very fragile, after which the bud will grow a branch.
If the tree has no bark, the upper branches are easy to dry out.
graft healing tissue
The tree above is an old mulberry grafted by the old gardener many years ago. It is really very large, but we can still see the traces of grafting. This is left by the years. There are two kinds of mulberry trees on such a mulberry tree.
Old mulberry and mulberry
Do you see the difference? It was truly amazing! Grafted fruit is sweet.
What do you think? Have you tried grafting flowers? If there are any problems, we can discuss them together.
WeChat search public account: flower cultivation exchange, micro signal: yanghuajiaoliu; exchange flower cultivation problems with national flower friends.

- Prev
Flowers and trees in Red Mansions | Peony: no matter it is ruthless and touching
Author: Jiang Chunlin's sixty-third time, Baochai's flower mark is: "painting: a peony character: Yan Guan Qunfang poem: any ruthless and moving note: present."
- Next

Sugarcane produces edible fungi!
In Chengmai, Hainan, there is an enterprise that has planted edible fungi with sugar cane! "this is a pocket mushroom, taste crisp, known as the best mushroom," the enterprise is responsible for.
Related
- Fuxing push coffee new agricultural production and marketing class: lack of small-scale processing plants
- Jujube rice field leisure farm deep ploughing Yilan for five years to create a space for organic food and play
- Nongyu Farm-A trial of organic papaya for brave women with advanced technology
- Four points for attention in the prevention and control of diseases and insect pests of edible fungi
- How to add nutrient solution to Edible Fungi
- Is there any good way to control edible fungus mites?
- Open Inoculation Technology of Edible Fungi
- Is there any clever way to use fertilizer for edible fungus in winter?
- What agents are used to kill the pathogens of edible fungi in the mushroom shed?
- Rapid drying of Edible Fungi