The Culture method of Dryopteris Dryopteris
Among ferns, Dryopteris is one of the most popular cultivated species. Beautiful stems and leaves, beautiful shape, small plant type, very suitable for small pot cultivation and embellished with mountain and stone bonsai. Because the black petiole is slender and shiny, very similar to human hair, and its texture is very soft, like a girl's soft hair, it is also known as "girl's hair"; its light green thin leaves are paired with jet-black and shiny petioles. It is particularly elegant and elegant. Distributed in Africa, America, Europe, Oceania and warm regions of Asia. Taiwan, Fujian, Guangdong, Guangxi, Hunan, Hubei, Jiangxi, Guizhou, Yunnan, Sichuan, Gansu, Shaanxi, Shanxi, Henan, Hebei, Beijing, Northeast China. Next, the editor of the network will introduce it.
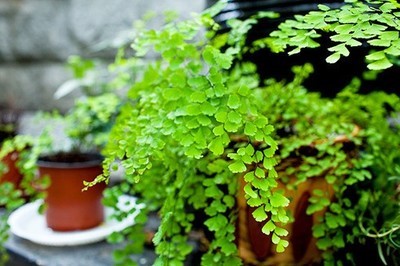
The Culture method of Dryopteris Dryopteris
Dryopteris przewalskii is often propagated by ramets or spores, which can be propagated indoors in four seasons, but it is generally carried out in early spring. Take the mother plant out of the basin, cut off its rhizome, so that each piece has part of the rhizome and leaves, and then planted in a small basin. New plants can be obtained by covering the rhizome with mixed soil, irrigating and culturing in a damp environment.
The method of spore reproduction is to sterilize the peat and fine sand as the substrate in the oven at high temperature to kill germs and weed seeds. Then, put the sterilized soil into a shallow sowing basin. Cut the leaves with mature spores, concentrate the spores and spread them evenly in the shallow sowing basin, without covering the soil, cover them with a piece of glass, soak the basin bottom with water, keep the basin soil moist, and place them in a semi-shady environment of 20-25 ℃. The spores can germinate into prothalli in about one month and can be divided after growing all over the basin.
Note that the glass on the sowing pot should be removed for ventilation 1-2 days before planting, so as not to cause plant rot or diseases and insect pests. In addition, it is very easy to spread spores to reproduce by themselves in a warm, shady and humid environment.
Planting
Pot, the pot can choose light glaze basin and tile basin; basin soil must have good water permeability and ventilation, generally with humus-rich peat soil or rotten leaf soil, and then add about 1 stroke 3 coarse sand and fine sand, and put in some bone powder, and the bottom of the basin should be covered with some broken tiles or coarse sand to facilitate drainage, rhizome planting depth of 1.5 cm 2.5 cm. Plant or turn the pot to change the soil in spring. Humus soil or peat soil is commonly used in potted plants, and a small amount of river sand and base fertilizer are added to form the culture soil. Change the box every spring, do not hurt the root when changing the basin, avoid the wind blowing, and keep the basin soil moist and high air humidity. It can be managed normally after the new branches grow.
Bottle planting
Bottle cultivation of Dryopteris is best to choose colorless transparent, flat surface of the square glass bottle, so that the plant will not look deformed and look good. Mix the peat and fine sand as the cultivation medium and put them in a bottle. It is best to put some old wall ash at the bottom of the bottle, which is more beneficial to the growth of Dryopteris. As long as the culture substrate is 2 to 3 centimeters thick, be careful not to stick the cultivation substrate to the bottle wall. Then use a sharp knife to divide the mother fern plant into several clumps, clip them with chopsticks and plant them carefully in a bottle. Large bottles can grow more than a few clumps, while small bottles can grow fewer clumps. Gently press the place where the plant is in contact with the cultivation substrate, and then water it. Then put the cap on the bottle and put the bottle in a place where there is no direct sunlight. Because the bottle is sealed, it can be watered once a month and fertilized for several months. In order to prevent the inner wall of the bottle from being covered with water fog, in addition to washing thoroughly with washing powder before use, special attention should be paid not to put them in a place with a large temperature difference. After the beginning of autumn, as the temperature drops, the fern enters a slow growth stage, and the old leaves will gradually turn yellow, so they should be cut off. The ambient temperature should not be lower than 5 ℃ throughout the winter. When the weather gets warmer in spring next year, the plant will grow a large number of new leaves, showing a scene of prosperity.
Raising Dryopteris in bottle not only saves time and labor, but also does not have to worry about the phenomenon that the leaves of the plant are not watered on time. Under the condition of high humidity in the bottle, the fern plant grows unusually strong. Put a bottle of iron fern on the coffee table in front of the window. From afar, the glass bottle is crystal clear, and the fern leaves are whirling, just like a green gem shining.
Temperature and light
Dryopteris prefers a warm, humid and semi-shady environment. The suitable temperature for growth is 21-25 ℃ in daytime and 12-15 ℃ at night. In winter, the leaves can keep fresh green when the temperature is above 5 ℃, but frost injury will occur when the temperature is lower than 5 ℃. Like bright scattered light, afraid of direct sunlight. Summer can be properly shaded, long-term direct light will cause most of the leaves withered and yellow. It should be placed in a brightly lit place indoors so that it can grow normally even if it is placed for 1 year.
Watering and fertilization
Dryopteris likes the humid environment and should be fully watered in the peak growing season. In addition to keeping the basin soil moist, we should also pay attention to the high air humidity and sprinkle water around the plant when the air is dry. Especially in summer, water should be watered 1-2 times a day. If there is a lack of water, it will cause the leaves to shrink. Watering taboo basin soil when dry and sometimes wet, easy to make the leaves yellow. Apply thin liquid fertilizer 2-3 times a month, do not stain the leaves, so as not to cause rotten leaves, because of the calcium-loving habits of Dryopteris, basin soil should add appropriate amount of lime and broken eggshell, the effect of regular application of calcium fertilizer will be better. In winter, we should reduce watering and stop fertilizing.
Pest control
Potted Dryopteris, often with leaf blight, can be controlled with Bordeaux solution at the initial stage, and 70% methyl topiramate 1000-1500 times in severe cases. If the plant is damaged by scale insects, 40% omethoate 1000 times solution can be used for control.
Dryopteris przewalskii likes shade, strong adaptability, easy cultivation, more suitable for indoor perennial pot ornamental. As a small potted shady foliage plant, it is better than asparagus in many aspects. Small potted plants can be placed on the desk or coffee table; larger potted plants can be used to decorate the windowsill, aisle or living room of the shady room, which can be appreciated for a longer time. The leaves of Dryopteris przewalskii are also good materials for cutting leaves and dried flowers.
Perennial evergreen herbs. Rhizome yellowish brown, densely covered with light brown scales, scales linear or lanceolate, membranous, veined, dense light brown long hairs. Leaves sparse, petiole scaly, all glabrous, up to 70 cm long, petiole fine, purple-black and glossy, about the same length as leaf blade, leaves bright green, ovate or oblong-ovate, 1-3-pinnate compound leaves, pinnae alternate, leaflets of different sizes, mostly Obovate or rhomboid, or fan-shaped, base cuneate, tip almost truncate and sunken in the middle, or 2-lobed, lobes of different length, sharp teeth Leaf veins radiate from base to margin, thin and forked. The sporangium cover is formed by the downward folding of the leaf edge at the top of the leaflet, with more than a dozen sporangia in each leaflet, usually rectangular, horizontal, slightly inward, curved, brown, white, membranous.
Culture methods of Dryopteris Dryopteris what are the culture methods of Dryopteris
Dryopteris Dryopteris, 0.1m high, with a thin and long stem, is a wild plant with a certain ornamental value, so it is often used for garden breeding, and now it has become one of the breeding plants chosen by many families. but in the breeding process, many people failed because they were not clear about the breeding methods of Dryopteris, so the following editor will share with you what the breeding methods of Dryopteris fern are, let's take a look!
Culture method of Dryopteris fern: soil
When preparing to breed the fern, you should first prepare a basin of good soil for it. As long as you pay attention to it, you will find that most of the wild ferns grow in places where the soil is soft and soft. Therefore, it is essential to prepare a basin of soft, watery, fertile calcareous soil or sand when raising the fern.
Culture method of Dryopteris Dryopteris: light
Dryopteris likes to grow in a sunny environment, so it is best to put it in an environment with good ventilation and plenty of sunlight, but it should be noted that Dryopteris likes scattered light and should not be exposed to the sun. if exposed to strong light for a long time, it will cause the leaves of Dryopteris to turn yellow and even die.
The third culture method of Dryopteris przewalskii: watering
Dryopteris likes to grow in a humid environment, and it is necessary to ensure sufficient water in its growing season, and if it is in a hot summer, when the air is especially dry, it should be sprinkled around Dryopteris in time to keep the air moist, and water it once or twice a day, otherwise the lack of moisture will cause the leaves of Dryopteris to shrink and cannot grow normally.
The fourth culture method of Dryopteris przewalskii: fertilization
Dryopteris is not particularly fond of fertilizer, so as long as it is guaranteed to apply some thin liquid fertilizer every two to three months, it should be noted that liquid fertilizer should not be sprinkled on the leaves in the fertilization process, otherwise it will cause the phenomenon of rotten leaves.
The culture method of Dryopteris Dryopteris: temperature
Dryopteris Dryopteris is a kind of plant that likes temperature and cold tolerance. It is suitable to grow in the environment of 21 ~ 25 degrees in daytime and 15 degrees at night. In cold winter, Dryopteris should be moved into the room and its growth environment should be kept above 5 degrees, otherwise it will lead to the phenomenon of leaf freezing injury.
Conclusion: the above are several breeding methods of Dryopteris, which are briefly introduced by the editor. Dryopteris is a common household potted plant, which not only effectively purifies the indoor air but also beautifies the indoor environment. In life, as long as you understand its growth habits, in fact, the breeding method is also very simple. [related links]: how do ⊙ jasmine raise ⊙ cactus, how to water ⊙, when do ⊙ blossom leaves turn yellow? ⊙ asparagus leaves yellowed ⊙ dahlia cultivation method ⊙ the efficacy and function of ⊙ jasmine tea ⊙ peony how to raise ⊙ Kunlun snow chrysanthemum the symbolism of ⊙ Ginkgo biloba leaves
[picture of Dryopteris] how to raise Dryopteris? The Culture method of Dryopteris Dryopteris
First, the cultivation method of Dryopteris how to raise Dryopteris 1: soil selection Dryopteris likes loose, fertile calcareous soil, families can use: garden soil + rotten leaf soil + sandy soil, mixed according to the ratio of 4:5:1. If you want Dryopteris to grow better, you can sprinkle some lime powder in the basin soil to increase calcium. How to raise Dryopteris 2: fertilization method 1. Dryopteris likes fertilizer, but there is little demand for fertilizer. Spring, summer and autumn is its growing season, and thin liquid fertilizer is applied once every 30 days. Ferrous sulfate solution can be irrigated 2 or 3 times a month. 2. Pay attention to the proper supplement of calcium fertilizer, so that the growth of Dryopteris will be better. 3. The temperature is higher in summer, so try to reduce fertilization. The temperature decreased gradually in autumn, and the fertilizer gradually stopped in mid-October. 4. Pay attention to fertilization, apply the thin nozzle spray pot slowly along the basin mouth, do not let the fertilizer liquid touch the leaves, otherwise it is easy to burn the leaves and affect the ornamental effect. How to raise Dryopteris 3: watering method Dryopteris likes a warm, semi-shady environment, watering once a day during the growing period, hot summer, watering each morning and evening, and sprinkling water on the leaf surface and around the basin at the same time to improve air humidity and keep the leaves green. If there is no one at home, you can put the flowerpot on the wet sand table to replenish the water. It can be watered every 2-3 days. When the temperature is low in late autumn, winter and early spring, the basin soil should be moist to prevent the surface of the basin soil from becoming dry. How to raise Dryopteris 4: light requires that although Dryopteris is a shade plant, it needs a certain amount of light in the growing season. When indoor maintenance, had better put on the balcony of the east or north, its illumination level is more ideal.
Summer noon should be shaded, and light should be seen properly in the morning and evening. Excessive light will cause the leaves of Dryopteris to zoom. If it is cultivated on the outdoor balcony, it should be shaded at noon in the four seasons to avoid burning and yellowing of the leaves.
How to raise Dryopteris 5: the temperature requires that the suitable temperature for the growth of Dryopteris is 15-20 ℃, and the winter temperature is not lower than 5 ℃ in order to keep the leaves fresh green. In midsummer, if the temperature is too high, you need to spray water to the plants every day to increase air humidity and cool down. How to raise Dryopteris 6: matters needing attention 1. Dryopteris should be planted or changed in spring. When changing the basin, be careful not to hurt the root system, avoid the wind blowing, and replace half of the new soil. Keep the basin soil moist and appropriate air humidity after changing the basin. 2. Due to the rapid growth of the leaves of Dryopteris, some of the old leaves are often cut off in the growing season. When the leaves are too dense, Dryopteris not only loses its elegant form, but also its new leaves will die due to lack of light, which is easy to form hollow phenomenon and need to be pruned in time. 3. When withered leaves are found in the process of maintenance, the withered leaves of Dryopteris should be cut off in time to keep the plants fresh and beautiful and conducive to the germination of new leaves. 4. Dryopteris prefers warm, humid and semi-cold environment and hates direct sunlight, so it is best to put the plant indoors where the sun is out of reach. After all, too much light is easy to cause scorch on the edge of the leaf.
5. Ferns grow in a humid environment, and Dryopteris Dryopteris is no exception. During cultivation, in addition to keeping the soil moist, water mist is often sprayed on the leaves to improve the humidity in the air. When the plant is yellowing, it is often caused by insufficient humidity. Of course, this may also be caused by frost injury.
6. The pot needs to be changed once every spring, and the dried leaves and old roots should be trimmed at the same time. The basin soil should also be replaced with fresh, fertile and loose rotten leaf soil, and it is best to add a small amount of brick dust inside.

- Prev
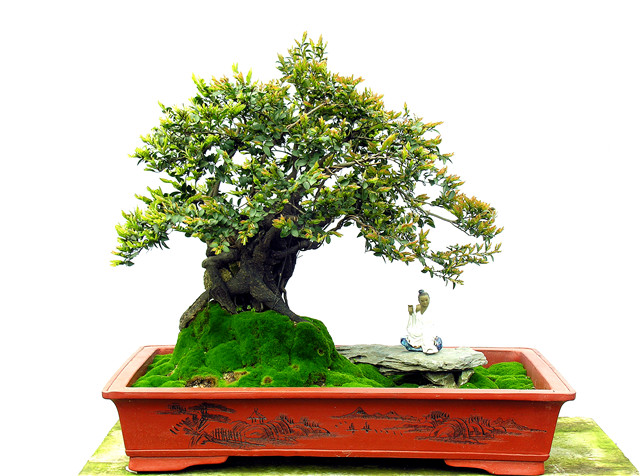
Black bone tea bonsai how to raise black bone tea picture
Black bone tea, also known as black sandalwood, black bone incense, produced in Xinhui, Taishan and other places, is a new bonsai tree species in the past 10 years. Due to strong ornamental, easy to take care of and other reasons, more and more people like it in recent years, coupled with slow growth without artificial cultivation, wild resources have almost been excavated, so the price has gone up all the way.
- Next
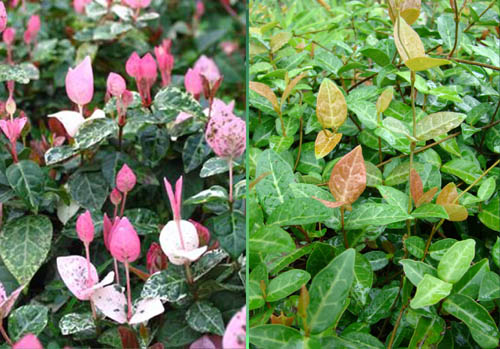
The culture method of flower leaf stone the picture of flower leaf stone
Huaye Luoshi is an evergreen woody vine with inconspicuous lenticels in its stem. Branchlets, young petioles and leaves abaxially pubescent, old branches and leaves glabrous. It is a light-loving, strong shade-tolerant plant and likes the environment with high air humidity. It can be used as a perennial flowering plant for all kinds of flower mirror arrangement. At the same time, it is also an excellent potted plant material.
Related
- Fuxing push coffee new agricultural production and marketing class: lack of small-scale processing plants
- Jujube rice field leisure farm deep ploughing Yilan for five years to create a space for organic food and play
- Nongyu Farm-A trial of organic papaya for brave women with advanced technology
- Four points for attention in the prevention and control of diseases and insect pests of edible fungi
- How to add nutrient solution to Edible Fungi
- Is there any good way to control edible fungus mites?
- Open Inoculation Technology of Edible Fungi
- Is there any clever way to use fertilizer for edible fungus in winter?
- What agents are used to kill the pathogens of edible fungi in the mushroom shed?
- Rapid drying of Edible Fungi