What are the disinfection points for orchid ramets?
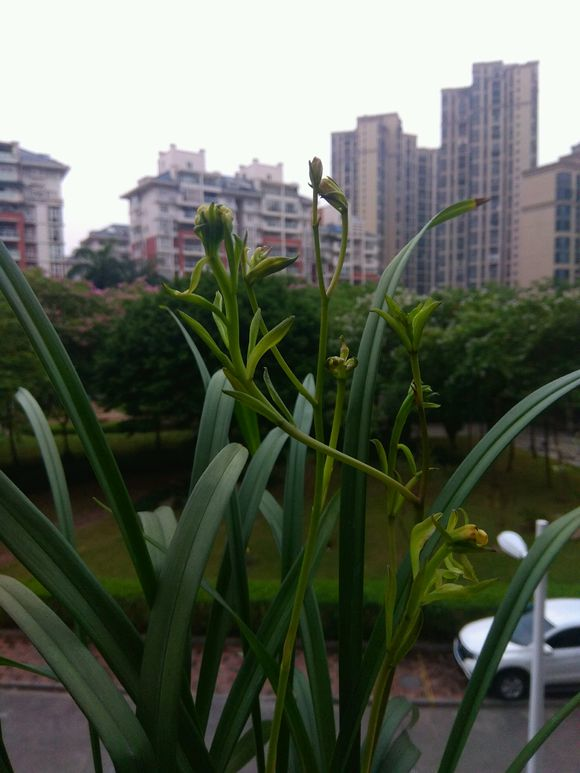
Orchids, this is a lot of people like farming, is super good-looking, easy to raise, a pot can develop a lot of pots, then orchid ramet with what disinfection? What are the points for attention of orchid ramets:
First of all, ramet can not be directly separated from the orchid seedlings, the best way is to find the right division point, so that it will not hurt the vitality of the orchid. The orchid seedling has a false bulb, and there is a new pseudobulb after the new seedling grows. Generally speaking, the connection point of the pseudobulb will not slowly move down until 4 years later, and the pseudobulb of the new and old seedlings can be separated slowly. It won't affect the orchid plant at all.
Points for attention of orchid ramets:
Orchids must grow to more than 5 seedlings, and preferably single seedlings conjoined, such orchids have strong resistance, will not cause any impact after separation, orchids have a strong ability to adapt to the growth, which is very suitable for expensive orchids.
Never forcibly separate orchid seedlings, especially those immature orchid seedlings, or false bulb links are not obvious, after separation, the wound is large, easy to cause bacterial infection and rotting roots, the survival rate is not high ah.
If you want the orchid to blossom, you must have enough nutrition. Choose the special organic fertilizer for orchid, which is rich in nitrogen, phosphorus and potassium, as well as the effect of promoting root and blue bud. Because the orchid bud is weak, you should use safe orchid fertilizer. Also pay attention to the frequent application of thin fertilizer, 1000 times the amount of water, just use it once every two weeks.
When ramet, if you see small buds, you must be careful to protect them so as not to hurt the buds. Ramet depends on the number of roots, more roots can be divided, less roots are not recommended, all orchid plants must have roots.
After the separation is good, it is best to use carbendazim solution to wipe the wound, dry and then plant in the new basin soil, so as to avoid causing bacterial infection. Then use organic nutrient solution to do fixed root water, dilute 800 times, can promote wound recovery, supplement enough nitrogen, phosphorus and potassium elements, and promote orchid growth.
The method of orchid ramet is introduced here, we should pay attention to disinfection, otherwise it is easy to rot.
How to split an orchid with a burst pot? Propagation skills of Orchid ramet
Flower lovers who cultivate orchids all know that orchids are bound to become large pots after they have been raised for many years, and it is time to divide them. In fact, the key to dividing the basin lies in the ramet. So how to split orchids in potted plants? Let's take a look at the ramet propagation techniques of orchids.
I. conditions and timing for ramet propagation of orchids
1. The ramet condition of orchid: the ramet usually grows after two or three years and the orchid plant has grown in the whole basin; in order to improve the germination rate or rapidly increase the number of breeding varieties, the conjoined orchid clusters with more than 4 plants are divided; and in order to prevent the degeneration of buds becoming odd, only one old and one new conjoined mother cluster is divided.
two。 Orchid ramet time: orchid ramet propagation can be carried out in all seasons of the year, but in order to ensure the survival rate, it is often carried out at an air temperature of 12 ℃ to 30 ℃. According to its physiological characteristics, the best time is at the end of flowering. Because the vegetative growth of the orchid plant is tired at this time, not only the new bud has not germinated, but also the growth point of the bud has not yet expanded, and the ramet is not easy to cause accidental injury. At the same time, the flowering period is over, generally there will be no more flower buds, there is no problem of damage to flower buds due to ramets. In addition, through ramet, it can also promote the activity of vegetative growth and improve the resilience and germination rate of orchid plants.
2. Key points of split propagation techniques of orchids.
1. Rise the seedlings.
When ramets change pots, the soil should be drier. If the basin soil is too wet, it is inconvenient to operate, and it is easy to break and injure the fleshy root. After turning out the mother plant when changing the basin, gently remove the mud and shake off the matrix in the root mass. If the matrix is hardened or sticky, it should be washed away with water and then clustered.
two。 Wash and dry the roots.
It is best to wash the roots with tap water. Soaking in water is easy to infect diseases and insect pests. After washing off the matrix, spread the orchid plant in the sun, cut off the rotten roots and cut off the roots. Wash the roots and leaves with clean water, dry the orchid roots and soften them, cut them with scissors at the bulbs with large gaps, and coat them with charcoal powder or sulfur powder to prevent bacterial infection, and then wait for seed.
3. Pick the basin. The ventilation degree of orchid basin is directly related to the growth of orchids. Generally speaking, tile basin is the best, purple sand basin is the second, and porcelain basin is the worst. When using the new tile basin, you should pay attention to soak in clean water for 3 days, then soak in disinfectant water for 2 hours, and then dry. For orchids that are difficult to grow, it is more appropriate to use tile pots. If you need indoor decoration or exhibition, you can use porcelain pots or glaze basins in tile basins. The bottom of the orchids must be filled with thicker materials to ensure ventilation and ventilation.
4. Put the ramets on the pot.
When the orchid is on the pot, the filling layer generally accounts for 1 to 4 of the height of the orchid pot, and the length of the root group is preferably 1 to 3 of the height of the orchid pot, so the ideal orchid pot is generally higher than other flowerpots, and the combination of the pot waist can be large or small, in short, it is necessary to let the orchid root have enough space to grow.
Potted orchid plants are generally based on the conjoined bodies of the second or third generations, and several bundles of natural plants are planted appropriately depending on the size of the basin, and then the fine soil is 2cm away from the mouth of the basin. Lift the orchid plant slightly to make the root stretch naturally, and the extraction height should be equal to the upper end of the pseudobulb and the basin soil surface, not too deep or too shallow. Shake the basin again so that the soil is in close contact with the root. And compacted around the basin by hand, so as not to cause holes when watering.
5. Management after being put into the basin.
The top layer of the flowerpot is covered with a layer of lichen or broken tiles, so that watering is not easy to cause basin soil consolidation and reduce basin soil moisture evaporation. The first watering is best to use the sitting pot method, the orchid pot to be planted is put in the water, and the basin surface is 3cm above the water surface, so that the water slowly permeates from the bottom up, wait for the water to infiltrate to the soil surface of the basin, and take out the orchid pot from the water. You can't directly bask in the sun for about 15 to 30 days in the shade. Watering should be controlled during this period and should not be too wet. Later, move to half-yin and half-yang, ventilated and ventilated, where you can get to the sun in the morning. Whether it is balcony cultivation or courtyard cultivation, it is best to put the flowerpot on the four-sided ventilated orchid rack, and the closed balcony should have sliding windows, which is good for reducing orchid diseases and insect pests.
This is the end of the introduction to the split propagation of orchids. Ramet propagation is the most traditional propagation method, which has the advantages of simple operation, high survival rate, rapid plant growth, early flowering, ensuring quality characteristics and so on.
Diagram of orchid ramet
In fact, orchid ramet is not difficult, as long as you are careful, the key point is to master the time of orchid ramet. In this article, we first talk about the time, and then refer to the ramet diagrams of other flower friends for reference.
1. The ramet time of orchids:
When the plant material in the orchid pot is used for too long or there is no room for growth, it is necessary to split or turn the pot, generally speaking, the ramet time is the most suitable in spring and autumn, when the orchid plant is in the mature stage, the damage rate can be reduced to the lowest. The first half of the year had better be the Spring Equinox to Grain Rain, when the florescence is over, the leaf buds have not yet sprouted, it is not easy to suffer frost injury, and the pot can be turned at the right time. In the second half of the year, it would be better for the Autumn Equinox to Frosts Descent, the orchid will enter a dormant state, then turning the pot will less affect the growth of the orchid. After winter rest and recuperation, nutrition accumulation, it will be able to blossom and sprout well in spring and master the propagation time of orchid ramets. It is also an important link in the conservation of orchids.
2. Diagram of orchid ramets (from: Anji Tiger):
1. Pour the pot (a pot of Chunlan grass cultivated for many years)
two。 Tool preparation (medical surgical scissors / scalpel / sterilized alcohol lamp), if conditions do not permit other sharp knives, such as blades.
3. Check (carefully look at the seedling structure to find the best plant separation point.)
4. Root management (after selecting the ramet point, first comb the root system, separate the staggered and entangled roots, pay attention to be careful and slow, reduce root cutting)
5. Twist (hold the root with both hands, twist gently, looking for the connection point; do not rudely break the Reed head with your hands, it is easy to damage new buds and leaves)
6. Cut down (keep an eye on the position, cut decisively. Note: every time the scissors, an orchid plant must be separated, until you see a split in two, do not move the second scissors; the result of hasty cut is to break the orchid plant into pieces.
7. Trim (cut off the withered and yellow trouser legs, where the dirt is hidden)
8. Rinse (rinse clean with running water)
9. Subdivision (for orchid plants that need to be subdivided, it is necessary to find a suitable connection point again, usually 3-4 seedlings per plant, so that the damage is less and it is easy to be rejuvenated)
10. Cut (use a scalpel and cut it carefully so that the wound is small and easy to heal. Note: the surgical blade should be changed in each basin to prevent the spread of the virus.
11. Apply medicine (all separate wounds are treated with fungicides. I use "Baituo" powder to touch the wound directly, which can effectively prevent the occurrence of stem rot in summer.)
End (after the orchid plants are separated, cool for 1 day, wait for the root system to soften, the wound shrinks, and then put on the basin. Note: do not water the pot within 3 days, which is beneficial to wound healing and prevent patients caused by basin division.

- Prev
How do orchids reproduce indoors or outdoors?
Orchid, which is a flower that many families like to grow, has a certain ornamental value. How do orchids reproduce? Do orchids go indoors or outdoors? How to reproduce orchids: 1. Sowing and propagation: the orchid seed is very fine, there is only one underdeveloped embryo in the seed, the germination power is very low, and the seed coat is not easy to absorb water.
- Next
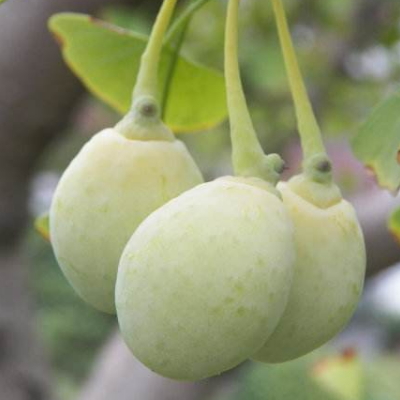
How can ginkgo fruit be cured without bitterness?
Ginkgo fruit is good for your health, but you can't eat more.
Related
- Fuxing push coffee new agricultural production and marketing class: lack of small-scale processing plants
- Jujube rice field leisure farm deep ploughing Yilan for five years to create a space for organic food and play
- Nongyu Farm-A trial of organic papaya for brave women with advanced technology
- Four points for attention in the prevention and control of diseases and insect pests of edible fungi
- How to add nutrient solution to Edible Fungi
- Is there any good way to control edible fungus mites?
- Open Inoculation Technology of Edible Fungi
- Is there any clever way to use fertilizer for edible fungus in winter?
- What agents are used to kill the pathogens of edible fungi in the mushroom shed?
- Rapid drying of Edible Fungi