Detailed explanation of planting methods of daisies
Daisies are annual herbs with cold-tolerant ecological habits and like sunny and cool climates. The planting method of daisies is more complicated. Today we will introduce in detail the planting methods of daisies.
Planting method:
Stage -, pot seedling stage -: the radicle germination stage starts from the radicle piercing the seed coat, the young root touches the soil, and the cotyledons grow out. The temperature should be kept at 18 degrees centigrade. Seed germination has good light property, so there is no need to cover the soil when sowing, but it is necessary to keep the cultivation medium moist and do not dry the medium at this stage. At this stage, the ph value remains between 5.5 and 6.2, and the relative humidity is 100%. Avoid direct sunlight and shade the seeds after sowing.
Stage: the emergence and growth of cotyledons begins from cotyledons to true leaves. The temperature remains at 18 degrees Celsius. Properly reduce the humidity of the cultivation medium, but still not too dry, the humidity is about 70% to 80%, can make the root system into the medium to absorb nutrients for the extension of cotyledons. The first and second stages take 14 to 21 days.
Stage 3: the stage of true leaf growth and development starts from the growth of true leaves, to 80% of the seedlings can be sold for the third stage. The temperature dropped to about 15 degrees Celsius. The air humidity also needs to be gradually reduced, and the substrate can have a dry-through process between the two watering, thus forming a dry-wet cycle, which is conducive to promoting root development.
Stage 4: in the seedling refining stage, the root system has been formed intact, the seedlings can basically be sold, and become hardy through seedling refining, this stage lasts about 7 days. The temperature, humidity and fertilization concentration are basically the same as those in the third stage. Attention should be paid to transplanting into the pot in time. The third and fourth stages take 7 to 14 days.

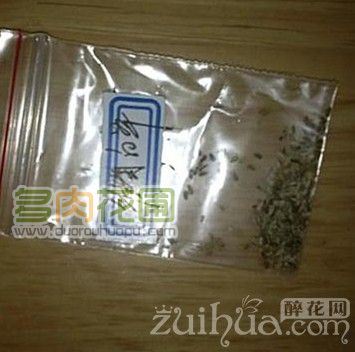
Daisy seeds are very small, with 4900-6600 seeds per gram, and family sowing is more than in September. There is a great difference in temperature between the south and the north, and most of the seeds are sown in Autumn from August to September in the south. In the north, most of the seeds are sown in spring or in autumn, but daisies are moved into a relatively warm indoor environment in winter.
Pot sowing should choose loose, breathable flowerpots. After disinfection, the flowerpot was sown with fine sand mixed with seeds, covered with fine soil about 0.5 cm thick, covered with sunshade net and watered thoroughly. Watering should be sprayed carefully to prevent soil surface hardening.
Keep indoor temperature of 18-22 ℃ and humidity of 80-90% after sowing. The radicle grows in a week or so. Still want to keep the medium moist after germination, need to be placed on the balcony to give light, but the germination time can not be too strong, to appropriate shade. From July to August, it is still necessary to cool down by shading around noon.
Daisies can be transplanted once when they have 2-3 true leaves. The suitable pH value of sowing medium is 5.86.5, and the EC value is 0.50.750.After sowing, the temperature is 18-20 ℃, the humidity is 80-90%, and it can germinate in 5-8 days.
Management after sprouting
The first stage
The humidity is 70-80%, so that it absorbs nutrients for the extension of its cotyledons, and the room temperature is controlled at 16-20 ℃ until the first pair of real leaves unfolds, which is mainly water-soluble fertilizer. After that, a transplant can be performed.
The second stage
For the rapid growth period of seedlings, in order to prevent the medium from getting too wet, special fertilizer for flowers should be applied alternately. Due to the high and low temperature and the size of transpiration, liquid fertilizer is generally irrigated once every 2-3 days instead of watering. When fertilized once at regular intervals, the concentration was relatively increased to 70-100ppm.
Note: the medium should be slightly dried between watering or fertilization, and the alternation of dry and wet should be used to promote seedling growth and root development. When the seedling length has 2-3 pairs of true leaves, the seedling height is 3-100px, and the root system is basically fully developed, the next stage of seedling refining can be carried out.
The third stage
The root system of the seedling has been fully grown, and there are two pairs of true leaves. The seedling refining process before putting on the pot can be considered. The temperature is the same as the previous stage, and the humidity decreases slightly. Moisture control is particularly important at this stage. It is necessary to have enough sunlight, strengthen environmental ventilation, control indoor temperature and humidity, and prevent it from overgrowing.
The above is the sowing method of my daisy and the management after germination. I hope it can be helpful to the flower friends. Please continue to pay attention to the succulent flower bed and learn more about flower seed planting.
The planting steps of daisy explain in detail how to grow daisies
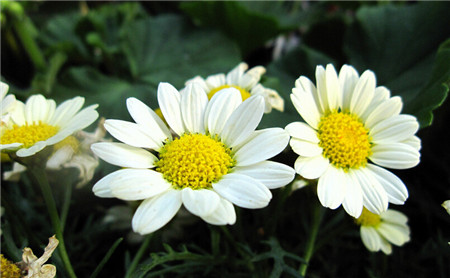
Daisies are biennial herbs, about 10 to 15 centimeters high. Leaves basal, spatulate, apex obtuse, base attenuate into stalk. Inflorescences solitary, scape hairy. Ligulate flowers striate, female, spreading; tubular flowers bisexual. Achenes Obovate, flattened, with marginal veins, finely hairy, without crown hairs. Daisies have cold-resistant ecological habits and like sunny and cool climates. Not resistant to shade, high temperature and severe frost. It is easy to die if it blossoms poorly under hot conditions.
Planting method:
Stage 1: the stage of radicle germination starts from the radicle piercing the seed coat, the young root touches the soil, and the cotyledons grow out of the cotyledons. The temperature should be kept at 18 ℃. Seed germination has good light property, so there is no need to cover the soil when sowing, but it is necessary to keep the cultivation medium moist and do not dry the medium at this stage. At this stage, the pH value is maintained between 5.5 and 6.2, and the relative humidity is 100%. Avoid direct sunlight and shade the seeds after sowing.
Stage 2: the emergence and growth of cotyledons begins with cotyledons, and the second stage is from cotyledons to true leaves. The temperature remains at 18 ℃. Properly reduce the humidity of the cultivation medium, but still not too dry, the humidity is about 70% to 80%, can make the root system into the medium to absorb nutrients for the extension of cotyledons. The first and second stages will take 14 to 21 days.
Stage 3: the stage of true leaf growth and development starts from the growth of true leaves, to 80% of the seedlings can be sold for the third stage. The temperature dropped to about 15 ℃. The air humidity also needs to be gradually reduced, and the substrate can have a dry-through process between the two watering, thus forming a dry-wet cycle, which is conducive to promoting root development.
Stage 4: in the seedling refining stage, the root system has been formed intact, the seedlings can basically be sold, and become hardy through seedling refining, this stage lasts about 7 days. The temperature, humidity and fertilization concentration are basically the same as those in the third stage. Attention should be paid to transplanting into the pot in time. The third and fourth stages will take 7 to 14 days.
Cultivation and management
1. Transplanting on the pot after refining seedlings can be transplanted, you can use a 12 cm caliber nutrition bowl or flowerpot to transplant on the pot. Pour the root water thoroughly after putting on the basin. For potted products, transplanting in early October is better than transplanting at the end of October, because if transplanted in early October, the roots of the plant can grow firmly in the container before the frost.
two。 The substrate uses a loose, draining and breathable cultivation substrate with a clay content of 15% to 30%. About 15% organic fertilizer (such as compost) can be added, and 1 kg of fully balanced fertilizer and 2 kg of slow-release fertilizer can be added to each cubic meter of substrate.
3. Water should be watered once after potting, and the matrix can be slightly dried and fully watered between two times of watering, following the principle of dry and wet, which is beneficial to the growth and development of roots. Care should be taken to keep the matrix moist, but not saturated. The water should be controlled when budding to prevent the flower stem from being too long.
4. The suitable temperature for fertility is from 10 ℃ to 12 ℃. It needs to be covered when cultivated outdoors. In order to obtain good plant quality, daisies should be cultivated under cold conditions as far as possible, but frost should be avoided and plants should be prevented from freezing. Daisies can survive the winter safely when they are more than 5 ℃. When the temperature was lower than 6 ℃, the growth was relatively slow and delayed the formation of flower buds, while when the temperature was higher than 12 ℃, the leaves increased, the flower stems were thin and weak, the number of flowering decreased and the growth potential decreased. Attention should be paid to timely ventilation when the outdoor temperature is getting warmer.
5. High light intensity is needed in both the growing period and the flowering stage. The light of the newly transplanted plant should not be too high, sufficient light can promote the growth of the plant, the leaf color is bright green, and the number of flowers increases. But during the frost period, it should be partially shaded to avoid direct sunlight.
6. Water soluble fertilizer was applied alternately every 7 to 10 days, and the concentration was from 150ppm to 200ppm. The root system of daisy is sensitive to the high salt content in the substrate, so it is necessary to avoid excessive salt content, excessive ammonium and high nitrogen concentration. Do not fertilize the plant at the beginning of October, reduce the amount of fertilizer used in winter, and apply balanced nitrogen and potassium fertilizer in spring. Before watering and fertilizing, the medium should be slightly dry and keep moist but not moist. Sufficient water and fertilizer in the growing season can not only make the plant grow luxuriantly, but also prolong the flowering period.
Pest management
The main diseases of daisies are seedling quenching, gray mildew, brown spot, anthracnose, downy mildew, insect pests and so on. The prevention of diseases and insect pests should be strengthened in peacetime. During cultivation, close planting should be avoided and cool environmental conditions with ventilation, ventilation and sufficient light should be maintained as far as possible, otherwise the plant will grow thin and overgrown. Keep clean, find infected plants, leaves, must be removed and cleaned at any time. When the disease occurs, chemical control measures should be taken immediately. Note: 1. Make the plant grow in a cool cultivation environment as far as possible to facilitate the compact shape of the plant. two。 Botrytis cinerea can be easily caused by high relative humidity and too humid leaves in winter. When cultivating, you can choose a slightly humid environment, but not too wet. 3. Daisies are clustered with basal leaves, do not strengthen ventilation, and the base is perishable, thus infecting bacteria.
- Prev

How to raise little daisies
In fact, it is not difficult to raise small daisies. Small daisies are cultivated by sowing. They are sunny, adaptable, cold-resistant, not resistant to extreme heat, and like cool and cold climates. They are suitable for growing in fertile soil with rich humus content and good drainage. The little daisy has a well-developed root system and a plant height of 12 cm.
- Next

Cultivation techniques of Magnolia
Cymbidium is often propagated by striping and split method. Sometimes sowing is also used. The ramets of Magnolia can be carried out in spring and autumn. The mother plants with dense branches are dug up and planted respectively, and the roots and short branches are trimmed. Striping, selected-yearly branches, can be propagated by piling soil or burying strips in early spring. Sow seeds, collect seeds in September
Related
- Fuxing push coffee new agricultural production and marketing class: lack of small-scale processing plants
- Jujube rice field leisure farm deep ploughing Yilan for five years to create a space for organic food and play
- Nongyu Farm-A trial of organic papaya for brave women with advanced technology
- Four points for attention in the prevention and control of diseases and insect pests of edible fungi
- How to add nutrient solution to Edible Fungi
- Is there any good way to control edible fungus mites?
- Open Inoculation Technology of Edible Fungi
- Is there any clever way to use fertilizer for edible fungus in winter?
- What agents are used to kill the pathogens of edible fungi in the mushroom shed?
- Rapid drying of Edible Fungi

