The propagation method of lavender, cutting oblique cuttage in water and then soil culture (survival rate 100%)
1. The propagation method of lavender has the highest survival rate of cuttings.
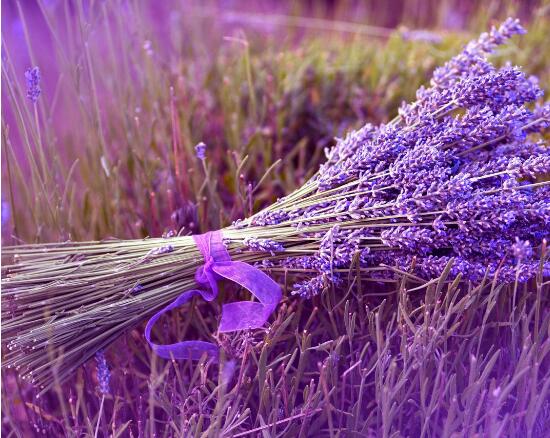
Lavender is deeply loved by young people and is one of the common flowers in life. Earlier we introduced how to raise lavender and what is the use of lavender. Now let's take a look at the breeding method of lavender. There are many propagation methods of lavender, the most common is cutting propagation and sowing propagation, cutting is the highest survival rate of reproduction methods, below we explain these propagation methods one by one.
Second, the cutting method of lavender
Among the propagation methods of lavender, cutting has the highest survival rate and strong adaptability, which can be carried out in spring and autumn. Generally choose disease-free and pest-free healthy plant terminal buds or tender, non-Lignification branch cuttings, cuttings length 8-12 cm. It is better to cut the lower end of the cuttings into an inclined plane and leave 6-8 leaves in the upper part of the cuttings, which is beneficial to keep the nutrients and accelerate the healing and rooting of the cuttings.
The cut of the cuttings should be close to the stem node and try to be smooth so as not to break the phloem. Remove the leaves of the bottom 2 sections, cut them in water for 2 hours and then cut them into the soil, and they will take root in about 2-3 weeks. After cutting, put the seedlings in a cool and ventilated environment, keep the soil moist for the first three days, and then depend on the weather to ensure that the branches do not wrinkle and wither, and improve the survival rate.
Note: watering should be done: do not flood the seedlings, do not accumulate water, and the leaves do not stick to silt, otherwise the seedlings will suffocate and die.
3. Methods of seed propagation
Lavender seeds are small and suitable for seedling and transplanting. The sowing time is generally spring, warm areas can be carried out in March-June or September-November every year, cold areas should be sown from April to June, and sowing can also be sowed in greenhouse winter. The time of germination is about 14-21 days.
Seeds should be soaked for 12 hours before sowing and then soaked with 20-50ppm gibberellin for 2 hours before sowing because of their long dormancy period. Before sowing, the land is leveled and watered, and after the water is seeped, the seeds are evenly sown, then covered with a layer of fine soil, 0.2 cm thick, covered with grass or plastic film to preserve moisture. This method of propagation of lavender is common in large areas.
Note: proper light is needed after germination, weak light is easy to grow in vain. If gibberellin is not used, it will take a month to germinate. It takes 1-3 months to germinate when the temperature is less than 15 ℃. Pay attention to spraying water in the seedling stage, when the seedlings are too dense, they can be suitable for seedlings, and when the seedlings are about 10 cm high, they can be transplanted.
Points for attention in reproduction
Lavender can't stand the heat and humidity, and it will die if it suffers from waterlogging for a long time. When planting outdoors, be careful not to let Rain Water sprinkle directly on the plant. After May, you need to move places where there is no direct sunlight, increase ventilation to lower the ambient temperature and keep cool, so that you can safely get through the hot summer. Pay attention to sunshine, moisture, temperature and patience. The above is the whole content of the breeding method of lavender for you. I hope it can help you.
The propagation method of potted camellia, cutting rooting and then soil culture (the simplest propagation method)
Camellia is very common in daily life. Any plant has its own method of reproduction, and camellia is no exception. There are many propagation methods of camellia, including sowing and propagation, cutting, grafting, leaf cutting and so on, but the simplest method is cutting. The survival rate of cutting propagation is very high, and it can take root after two months of good care.
1. The propagation method of camellia, the survival rate of cutting propagation is the highest.
The unique fragrance of camellias is deeply loved by people. With the progress of pot technology, camellias can also be raised at home. Earlier we talked about how to raise camellias and what is the efficacy and function of camellias. Now let's take a look at the breeding methods of camellias. The simplest propagation method with the highest survival rate of camellia is cutting. let's take a look at the steps of reproduction.
2. Cuttage propagation
The cuttage method for propagation of camellias is the easiest, and the best time is in September, and it is also possible in spring. Select well-growing, semi-lignified branches, remove the basal leaves, retain the upper leaves, cut the slant with a sharp knife, soak the incision in 200--500ppm indolebutyric acid 5-methylene for 15 minutes, then dry, then insert the sand basin or vermiculite pot species, wait for about 40 days for the wound to heal, during which time to continue watering. It usually takes about two months to take root.
It is also possible to select 3-4-year-old branches from late June to early July, peel 1-2cm stem bark around the lower end, reach to the xylem, and cut the cuttings after the callus at the wound expands. The cuttings should be cut as soon as they are cut. The best cutting depth is 1ax 3-1max 2 of the length of cuttings, and the row spacing is 5cm × 15cm. After insertion, press the matrix and spray water through a fine-hole spray can, place it in a semi-shaded place and spray water 1-2 times a day.
Note: keep the air humidity and substrate moist (it is better to store river water for 2-3 days or Rain Water for 2-3 days) and keep the temperature 20-25 ℃, and pay attention to gradually strengthen ventilation and receive sunlight, cuttings can take root in 1-2 months. After rooting, it is transplanted into the mud basin of caliber 7.5cm and managed normally after setting, which is one of the simplest propagation methods of camellia.
Third, the method of leaf insertion and reproduction
Camellia usually uses branch cutting propagation method, but some valuable varieties are limited by the source of branches, or considering the reasons that will affect their tree shape after sampling, so leaf cutting method can also be used, which is also a propagation method of camellia.
It is beneficial to ventilation and drainage, so mountain mud should be used as cutting substrate. The matrix is placed in a tile basin and then inserted into the basin. In the rainy season, one-year-old leaves can be used as leaf insertion material, (too old is not easy to root, too tender and perishable, annual is just right) insert soil depth of about 2 cm, after insertion, press the soil, pour enough water, and then put it in a cool and ventilated place. Generally, it can take root after 3 months, and it can sprout and branch in the next spring.
IV. Grafting and breeding
Select strong seedlings or camellia varieties that are easy to survive as rootstocks, cut off at about 4 cm from the ground, split 1.5 cm deep through the pith, use 1-2-year-old branches as scions, keep 1-2 leaves in the upper part of the scion, cut into wedges in the lower part, and insert into the split of the rootstock, the cambium of the two sides should be closely joined, and then fastened with plastic tape.
Note: after grafting, cover the top of the scion with a plastic bag and tie it with a belt below, but not too tight, so as to form water droplets in the bag and keep dripping on the rootstock. Add a wrapping paper bag to the outside of the plastic bag to block out the direct sunlight.
Camellia is a kind of potted plant that is easy to raise. It is absolutely harmless to raise camellias at home. Friends who like camellias can try to raise them at home. The above is the whole content of the breeding method of camellia. I hope I can help you.
How to propagate camellias, the survival rate of four propagation methods / cutting methods of camellias is 100%.
Camellia, a very beautiful flower, is loved by people for its beautiful shape and rich colors. In life, raising a few pots of camellias at home is the choice of many people, and many of them go to the store to buy them directly. In fact, in addition to buying existing camellia pots, you can also breed by yourself. Here are four breeding methods of camellias. Follow the editor to have a look.
First, how to propagate camellias, cutting / leaning / leaf cutting / high cutting
As one of the top ten famous flowers in China, camellia is an indoor potted plant for many people. However, a pot of camellias is very monotonous, and it is only enjoyable to plant multiple pots together. If you don't want to go out and buy it, you need to do it yourself. as for how camellias reproduce, there are four methods: cutting, leaning, leaf cutting and high cutting, and how to do it. Let's move on.
2. Four propagation methods of camellias (1) cutting methods of camellias
There are many propagation methods of camellia, both sexual reproduction and asexual reproduction can be used, but the most commonly used is cutting and grafting. Among them, the cutting method of camellia is relatively simple, let's introduce it in detail.
① cutting time
How to reproduce camellias must first choose the right time. The cuttage propagation of camellias is best selected in September, or in the middle of May in spring.
② cuttings selection
In the cutting method of camellia, the selection of cuttings is particularly important, it will directly affect the survival rate of reproduction. On a sunny day in September, well-nourished and robust semi-lignified branches were cut as cuttings.
Cuttings treatment: the length should be cut to about 6-10cm, preferably with 2 prime 3 nodes. Then remove the basal leaves, keep the upper 3 leaves, and cut them into bevel with a sharp knife. After that, disinfect the cuttings, apply some carbendazim to the wound, and then leave it in a cool and ventilated place to dry.
③ cuttage start
After the cuttings are dried in the sun, they can be inserted into a sand basin or vermiculite basin, or they can be inserted into a container filled with water. pay attention to keeping them moist, and they will take root in 2 weeks. Generally speaking, cuttings are very easy to survive, and if handled properly, the survival rate of camellia cuttings can reach 100%.
(2) the connection method of camellias.
It is one of the most common propagation methods of camellias. It mainly breeds precious camellias. Rely on the rootstock: generally choose Camellia oleifera; connecting time: between Ching Ming Festival and the Mid-Autumn Festival.
Connection method: plant the rootstock in a flowerpot, cut off about half of the parts you want to combine with a knife, and pay attention to a smooth incision. Then, close the cut sections of both sides, wrap them with plastic film, and water the rootstocks twice a day.
Maintenance: it can be healed after 60 days, cut off and planted at that time, and placed in the shade to avoid direct sunlight. In February of the following year, the tail of the rootstock was cut off with a knife, then planted, and then maintained according to the culture method of camellias.
(3) Leaf insertion of camellias.
Considering the limitation of the source of valuable camellia branches, the leaf insertion method was adopted to propagate into a choice. The specific operations are as follows:
Cutting substrate: the mountain mud is mixed with 1P3 river sand to ensure good ventilation and drainage. Then put the matrix in an earthen basin.
Cuttings selection: one-year-old leaves can be used as leaf cuttings, pay attention to the leaves can not be too old or too young, too old not easy to root, too tender and perishable.
Start cutting: insert the selected leaves into the soil about 2 cm deep, press the soil, pour enough water, and then put it in a cool and ventilated place. Generally, it can take root in 3 months, and it can sprout and branch in the next spring.
(4) High insertion of camellias
In addition to the above three, high insertion is also one of the propagation methods of camellias, which is characterized by the ability to attach all the weak twigs that should have been pruned to new life. More importantly, this method has high survival rate, quick rejuvenation and early flowering, so it is very suitable for beginners to try. The specific operations are as follows:
The thin branches that need to be pruned are girdled in an appropriate position. The length of the girdling can be between 5-8 mm. The plastic film of appropriate size is bound, and the disinfected peat soil or rotten leaf soil is added into the film. After 7-10 days, the lower part of the plastic film is then girded for 5-8 mm, and then a new life is born!
Generally speaking, camellia has strong vitality, and the four breeding methods are easy to survive, but in terms of convenience and survival rate, cutting and grafting are the best. Of course, the method is dead, people are alive, we can according to the actual situation, choose the method to breed. With regard to the breeding methods of camellias, this is the end of the editor's introduction, hoping to bring help to everyone.

- Prev
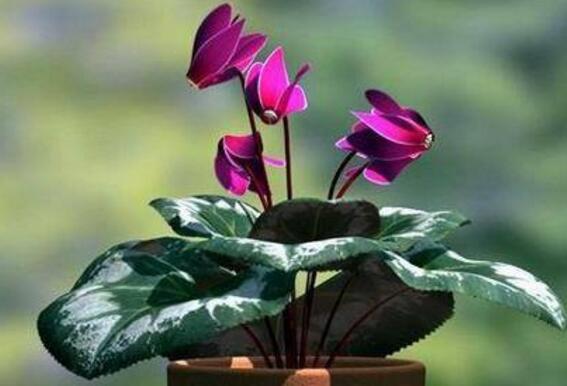
How to reproduce cyclamen? the reproduction method / seed propagation of cyclamen is fast and convenient.
Cyclamen, like its name, looks fresh and refined, unlike human flowers, attracting countless flower friends to keep it at home. However, a pot of cyclamen is obviously a bit monotonous, and some flower friends still want to breed more to make the flowers more beautiful, so how to breed cyclamen? Cutting doesn't apply to it.
- Next
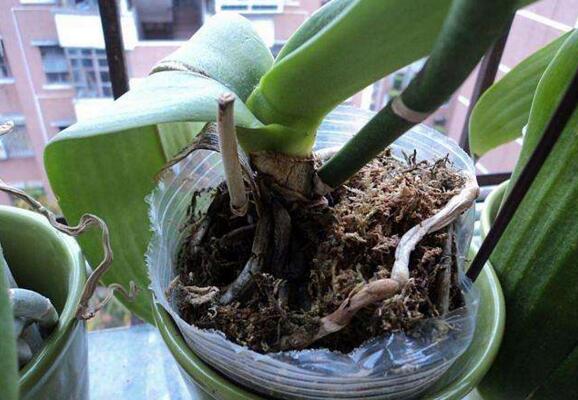
The breeding method of Phalaenopsis, learn 4 tricks to make you spend less money.
In the flower world, Phalaenopsis is famous for its beauty. It is shaped like a butterfly and has a rich fragrance. It is not only pleasing to the eye, but also can improve the environment and purify people's mind. However, the flowering of a pot of Phalaenopsis is obviously a bit monotonous. In order not to spend money unjustly, the editor sorted out several breeding methods of Phalaenopsis.
Related
- Fuxing push coffee new agricultural production and marketing class: lack of small-scale processing plants
- Jujube rice field leisure farm deep ploughing Yilan for five years to create a space for organic food and play
- Nongyu Farm-A trial of organic papaya for brave women with advanced technology
- Four points for attention in the prevention and control of diseases and insect pests of edible fungi
- How to add nutrient solution to Edible Fungi
- Is there any good way to control edible fungus mites?
- Open Inoculation Technology of Edible Fungi
- Is there any clever way to use fertilizer for edible fungus in winter?
- What agents are used to kill the pathogens of edible fungi in the mushroom shed?
- Rapid drying of Edible Fungi