Clematis cuttage steps:
1. For the selection of branches, we should try to choose the relatively tender ones, which are not completely Lignified. Young shoots are easier to take root and sprout.
2. Cut the branches short and place them in vitamin B solution for two hours. After taking them out, apply some rooting powder slightly.
3. Insert the branches into the seedling box with perlite. Spray water in time after all plugged in.
4, cover the transparent, ventilated box, must not suffocate the branches, at the same time do not direct sunlight.
5. Open the box for ventilation for two days and spray nutrients containing B vitamins.
6. After the white root system grows, it can be transplanted into the flowerpot. For the soil, perlite or peat soil can be chosen. After transplanting, it should be placed in a sunny place and need more watering every day.
These are the steps of clematis cuttage! In fact, the steps of clematis cuttings are very simple, just do these points well. So, is there anything we should pay attention to in the process of clematis culture?
The method of Cuttage Propagation of Clematis (example Operation procedure)
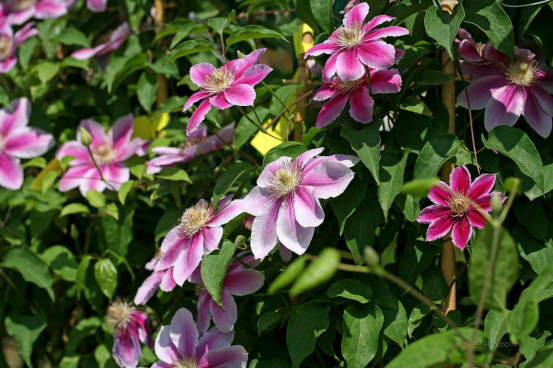
Clematis has gradually become popular in the past two years. Indeed, its flowers are so beautiful that they deserve the laudatory name of "Liana Flower Queen".
At present, the propagation method of clematis is mainly by cutting. However, because of its long internodes, there are not many cuttings for a clematis to cut. Therefore, the survival rate is particularly important for clematis cuttings! Because there are not many materials.
Cutting method of Clematis clematis
The propagation, cultivation and propagation methods of clematis: sowing, striping, grafting, split or cutting propagation.
1. Selection of cuttings
This step is the most critical point for Clematis cuttings to survive. First of all, of course, there should be healthy and healthy branches with at least one node. The second is to choose semi-Lignification, this year's new article, should not be too young nor too old. Finally, the incision should be flat, the knife should be sharp, do not squeeze the incision.
2. Selection of matrix.
Clematis generally prefer fertile substrates with good drainage. You can choose a matrix in which peat and perlite are mixed at 3:1 or 2:1. Water thoroughly before cutting.
3. Before cutting
Cuttings can be soaked in rooting for half an hour. Punch the hole with a stick, put the insert in, and press it with your hands. Insert 2-3 cm, or leave the node on it. After plugging in, pour water thoroughly.
4. Avoid the sun
Note that it should not be placed in strong light, but there should be astigmatism and good ventilation. In addition, to maintain humidity, the temperature had better be controlled at 20 to 30 ℃. You can use plastic bags to moisturize. Generally 15 days or so, the incision will expand, begin to take root signs, the upper bud will also pull out long leaves, a month or so can take root.
Introduction to the cutting steps of four common potted plants
For lovers of flowers and plants, flowers and plants are all of life, which can not only nourish feelings and regulate life, but also afforest the environment and enhance household taste. However, raising potted plants is indeed a matter of spending money. It costs money to buy flowers and plants, to buy pots to buy soil, and to buy flowers and fertilizers. All these add up to a lot of expenses. In this regard, netizens often say, "want to save money, learn to cut" in fact, many potted plants do not need to buy, pinch a branch, can grow a full pot. Next, the editor will introduce to you four kinds of potted plants that can grow full of flowerpots with a pinching branch.
Picture: sun flower pot planting
1. Sunflower
I believe we are no stranger to sunflowers. Sunflowers are notoriously easy to feed, sun-resistant and drought-resistant, so friends who want to raise sunflowers can live without buying them and pinching a branch.
Cutting steps:
1. The summer weather is hot, sometimes it is necessary to prune the sunflowers, and the pruned branches can be used for cutting.
two。 Cutting branches, you can choose to cut short into a small section, or you can choose to cut directly with the cut branches.
3. Sunflowers are particularly easy to feed, as long as the soil of the cuttings is loose and ventilated, nothing else is required, and then the soil will be watered once.
4. Insert the sunflower branches into the soil, put them in a cool and ventilated place for a few days, and then take root in a few days.
5. After taking root, I moved to the sun to bask in more. When I saw that the basin soil was dry, it would be permeated once, and it would soon burst!
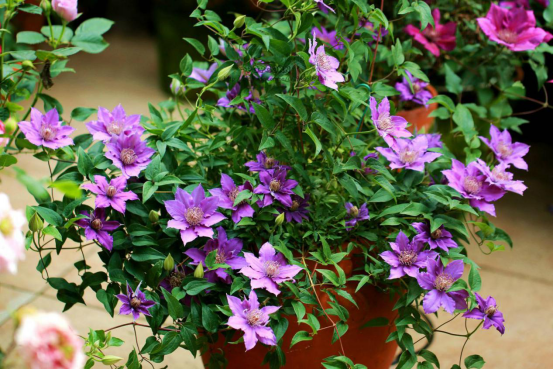
Picture: clematis potted
2. Clematis
Cutting steps:
1. Clematis cuttings, it is best to choose flowering branches, because such branches contain more nutrients, it is easier to root.
two。 Cut back the clematis branches, cut them into a short section, and retain at least one pair of leaves on each branch.
3. Cuttings can choose to use black sponges to create a dark environment and promote clematis to take root.
4. Punch holes in the black sponge, insert the cuttings into the sponge, and then insert a thin wire to fix the cutting branches.
5. The clematis branches are fixed on the foam box with iron wire and then maintained on the cool and ventilated north balcony.
6. In about a month, clematis cuttings can take root.
Picture: triangular plum
Third, triangular plum
Cutting steps:
1. High temperature in summer, if the branches of triangular plum are airtight, it is easy to produce all kinds of diseases and insect pests, so you need a slight pruning, and the cut branches are just right for cutting!
two。 Disinfect the branches in carbendazim solution, dry the wound, and then insert it into the soil. The nutrient soil of cutting can be mixed according to the proportion of peat soil and perlite at 2:1.
3. Put the cuttage plum in a cool and ventilated place for maintenance, and it will take root in about a month.
4. If you want the triangular plum to take root quickly, you can also insert it with water. Insert the cutting triangular plum branches into the flower mud block, and put the flower mud block in a disposable paper cup filled with water.
5. By using the method of water insertion, triangular plum can also take root very quickly.
Picture: hibiscus potted plant
Hibiscus hibiscus
Cutting steps:
1. Strong branches were selected for cutting on the small hibiscus plant in order to improve the survival rate of cutting.
two。 Prune the hibiscus branches, each about 5-8cm in length, then soak them in carbendazim solution for about 2 minutes and leave them in a cool and ventilated place to dry.
3. If you don't have a nursery box at home, you can prepare disposable paper cups, and the cutting soil can be mixed with perlite and vermiculite, permeable and breathable.
4. Insert dried hibiscus twigs into disposable paper cups
5. Before long, it will be found that the little hibiscus has taken root.
6. In addition to the method of soil insertion, small hibiscus branches can also be inserted into the foam for water insertion, and it is also very fast to take root.
7. After taking root, the small hibiscus is transferred to the flowerpot to continue maintenance. Small hibiscus likes the sun, had better be placed on the south balcony or south windowsill to receive sufficient sunshine, high temperature in summer, to pay attention to shade ventilation, to avoid sunburn of hibiscus.
[editor's conclusion] learning to cut flowers and plants can not only save money, but also gain a great sense of satisfaction. Above, we have introduced the cutting steps of four common potted plants. Let's try it together.

- Prev
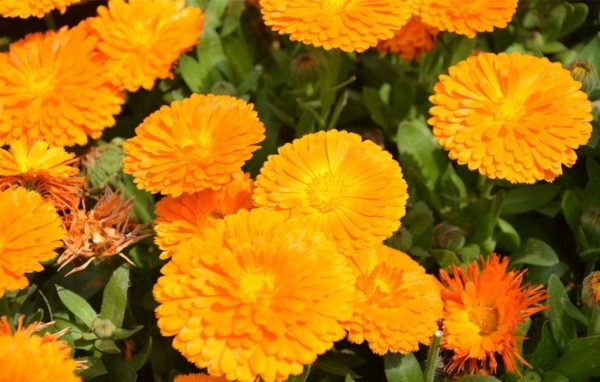
Culture method of Calendula
The soil marigold is not strict with the soil and likes to grow in the fertile alkaline sandy soil with good drainage. The PH value of the soil should be about 6-7. The soil is fertile enough to ensure that the marigold is more branched and blossoms. Calendula likes to grow in a sunny environment, but avoid high temperatures
- Next
Key points of clematis culture:
1. Soil: clematis like alkaline soil with fertile, loose and smooth drainage, and can not accumulate water or be too dry. 2. Watering: clematis is not allowed to be too wet. Daily watering should be controlled, not too much, especially in the summer season with more Rain Water.
Related
- Fuxing push coffee new agricultural production and marketing class: lack of small-scale processing plants
- Jujube rice field leisure farm deep ploughing Yilan for five years to create a space for organic food and play
- Nongyu Farm-A trial of organic papaya for brave women with advanced technology
- Four points for attention in the prevention and control of diseases and insect pests of edible fungi
- How to add nutrient solution to Edible Fungi
- Is there any good way to control edible fungus mites?
- Open Inoculation Technology of Edible Fungi
- Is there any clever way to use fertilizer for edible fungus in winter?
- What agents are used to kill the pathogens of edible fungi in the mushroom shed?
- Rapid drying of Edible Fungi