Planting techniques of seed bulbs of Ranunculus chinensis
time
In order to prolong the growth period, we can choose to sow in September and sow in October later.

Temperature
The optimum temperature for seed germination is 10 to 15 degrees.
Seeding box
In order to facilitate management, buttercup bulbs are often sown in a sowing box. Before sowing, sandy soil with relatively rich soil must be sprinkled in the sowing box, and the soil can be loosened and ventilated with wooden boards.
Sowing seeds
Sow with a fresh bulb, because the fresh bulb is more active, then sprinkle it in the sowing box, cover it with a layer of fine soil and gently compact it with a plank. Pour a small amount of water to soak the soil, but not too much water, the water level is not higher than the surface of the box soil.
After learning the planting techniques of buttercup, we must also pay attention to these points for attention.
How to grow a buttercup seed ball? Buttercup bulb planting method (Picture) Ranunculus Ranunculus, alias celery flower, Lulian flower, is a perennial herbaceous flower of Ranunculaceae and Ranunculus. The flower is rich in color, mostly double or semidouble, the flower shape is similar to the peony, but smaller, the flower diameter is generally 8cmdiameter 1cm; the leaf is similar to the celery leaf, so it is often called celery flower. It can be propagated with bulbs. Today, we mainly introduce the experience of flower friends using bulbs to breed buttercups for your reference and study. I got a seed ball of Ranunculus a few days ago, and I was ready to accelerate germination in October. Because the seed ball of buttercup is dry during storage, if it absorbs water quickly during germination, most of the bulbs will rot. At the same time, if the temperature of the bulb is too high, it is safest to absorb water at low temperature, so it must be absorbed slowly below 5 ℃. The seed is ready to start on September 13, and the weather is still relatively hot and the temperature is 22 Mel 33 degrees. No matter, see that there are flower friends have planted, I also itch ha ha 1, prepare a bowl of fine sand, the flower hair Ranunculus claws buried in the sand. Spray the sand (there is no water at the bottom of the bowl), wrap it in a fresh bag, put it in the refrigerator, and dig it out 7 days later. It takes a week to absorb water, and then take it out and plant it. You don't need watering when you put it in the refrigerator. Wait patiently for a week to take out the planting.) after a week of water absorption on September 20, the octopus paw root of the buttercup is full. If it is planted in mid-late November, it does not need to be put in the refrigerator. Put sand in the basin and bury the buttercup bulbs with your paws down. Bury it just enough to cover the ball top, pour it thoroughly, and then transplant it to the basin after sprouting. Don't water it during this germination period, but slowly let it absorb moisture from the soil until it swells up, otherwise it is easy to rot. 2. Watering: after germination, it is neither too dry nor too wet. It is best to choose a flowerpot with large bottom hole and thin wall to facilitate drainage and ventilation. At the bottom of the basin, coarse gravel is used as the drainage layer, and then the culture soil is filled. The culture soil can be prepared with rotten leaf soil, garden soil and river sand, and mixed with appropriate amount of bone powder as base fertilizer. Sow seeds from September to October, 18 cm diameter flowerpots can be planted into 3-5 fibrous roots (small claws), planting cover soil should not be too thick. Put a well-ventilated semi-shade after planting to keep the pot soil moist and not to water too much to prevent rotting roots. Buttercup is very fertile. In the early stage of growth, thin liquid fertilizer can be applied once every half month. With the growth of flower seedlings, it can be changed to top fertilizer once every 10 days, and gradually increase the concentration and amount of fertilizer. Frosts Descent moved into the room before, put it in a place with sufficient light, and pay attention to ventilation. Continue to grow in the environment of 10-20 °C, bud can appear before and after New Year's Day, and the basin soil should be dry at this time. After budding, 4-5 strong buds are selected for each plant, and the rest are picked to make the nutrition concentrate and blossom. Stop fertilizing during flowering and move it to a cool place to avoid direct light, which can prolong the viewing period of flowers. If there is no seed left after flowering, the residual flowers should be cut off in time and continue to strengthen fertilizer and water management so as to enrich and enlarge the root tuber until the aboveground is withered and yellow and enters dormancy. 3. Lighting: just put it on the balcony (do not let the sun shine directly). 4. Fertilization: apply thin fertilizer only once before flowering. 5. Others: I think it is better not to put it outside in winter. In addition, buttercups are easy to cause overgrowth, yellow leaves and stem base rot during the growing period. The main pests are root maggots and leaf miners, which are sprayed with 1000 times of omethoate EC, and root rot is irrigated with 1000 times of 50% benzoate wettable powder. In the early budding stage of buttercup, 3-5 robust buds were selected for each plant, and the rest was removed. At this time, the basin soil should be a little drier. If there is no need to leave seeds after flowering, the residual flowers should be cut off in time. Conclusion: the above is the introduction of the planting methods of buttercups. I hope you can exchange more experience in planting buttercups. The planting method of Ranunculus Ranunculus
Some time ago, a friend of mine got a buttercup seed ball and was ready to sprout, but he didn't know how to grow it. I believe many friends must have been bothered by this problem. Today, I would like to share with you the planting method of buttercup seed ball.
The planting method of Ranunculus Ranunculus
1. Prepare a bowl of fine sand and bury the hairy claws down into the sand. Spray the sand (there is no water at the bottom of the bowl), wrap it in a fresh bag, put it in the refrigerator, and dig it out 7 days later. It takes a week to absorb water, and then take it out and plant it. You don't need watering when you put it in the refrigerator. Just wait patiently for a week to come up with the planting.)
If you plant it in mid to late November, you don't need to put it in the refrigerator. Put sand in the basin and bury the buttercup bulbs with your paws down. Bury it just enough to cover the top of the ball, pour it thoroughly, wait until it has sprouted and then transplant it into the basin. Do not water it during this germination period, but slowly let it absorb water from the soil until it expands, otherwise it is easy to rot.
2. Watering: after germination, either dry or wet, it is neither too dry nor too wet. Potted buttercups had better choose flowerpots with large bottom holes and thin walls to facilitate drainage and ventilation.
At the bottom of the basin, coarse gravel is used as the drainage layer, and then the culture soil is filled. The culture soil can be prepared with rotten leaf soil, garden soil and river sand, and mixed with appropriate amount of bone powder as base fertilizer.
Sow seeds from September to October, 18 cm diameter flowerpots can be planted into 3-5 fibrous roots (small claws), planting cover soil should not be too thick. Put a well-ventilated semi-shade after planting to keep the pot soil moist and not to water too much to prevent rotting roots.
Buttercup is very fertile. In the early stage of growth, thin liquid fertilizer can be applied once every half month. With the growth of flower seedlings, it can be changed to top fertilizer once every 10 days, and gradually increase the concentration and amount of fertilizer. Frosts Descent moved into the room before, put it in a place with enough light, and pay attention to ventilation. Continue to grow in the environment of 10-20 °C, bud can appear before and after New Year's Day, and the basin soil should be dry at this time.
After budding, 4-5 strong buds are selected for each plant, and the rest are picked to make the camp concentrate on blooming. Stop fertilizing during flowering and move it to a cool place to avoid direct light, which can prolong the viewing period of flowers. If there are no seeds left after flowering, the residual flowers should be cut off in time, and the management of fertilizer and water should continue to be strengthened so as to enrich and fatten the roots until the aboveground parts turn yellow and enter dormancy.
So much for the planting method of Ranunculus. Have you all learned it? Buttercups like mild climate, fresh and moist air, shady growth environment, not resistant to cold and freezing, but even more afraid of the hot sun.
- Prev

The breeding method of Fulukao
Although Guangzhao Fulukao is an ornamental flower, its real origin is a wild flower by the side of the road. It is often said that roadside wild flowers give some sunshine, so we can rest assured to give them enough light, proper shade is also more conducive to its growth. We can often see the temperature on a hot summer day.
- Next

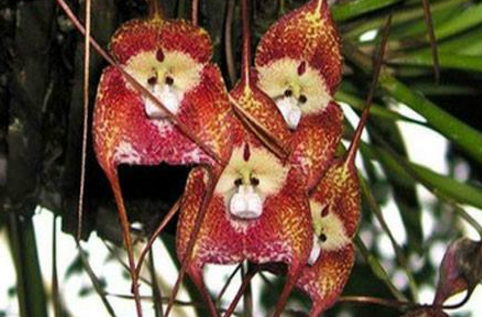
The Propagation method of Monkey-faced Cymbidium
Sowing and breeding monkey face small dragon orchid can self-pollinate, but the seeds are easy to scatter, so they should be collected in time. Monkey face small dragon orchid seeds, can be used to raise seedlings on a flat plate, do not need to cover the soil, to have sufficient sunshine, generally a month to seedling. The seedlings do not need to be watered frequently, just keep the substrate moist.
Related
- Fuxing push coffee new agricultural production and marketing class: lack of small-scale processing plants
- Jujube rice field leisure farm deep ploughing Yilan for five years to create a space for organic food and play
- Nongyu Farm-A trial of organic papaya for brave women with advanced technology
- Four points for attention in the prevention and control of diseases and insect pests of edible fungi
- How to add nutrient solution to Edible Fungi
- Is there any good way to control edible fungus mites?
- Open Inoculation Technology of Edible Fungi
- Is there any clever way to use fertilizer for edible fungus in winter?
- What agents are used to kill the pathogens of edible fungi in the mushroom shed?
- Rapid drying of Edible Fungi

