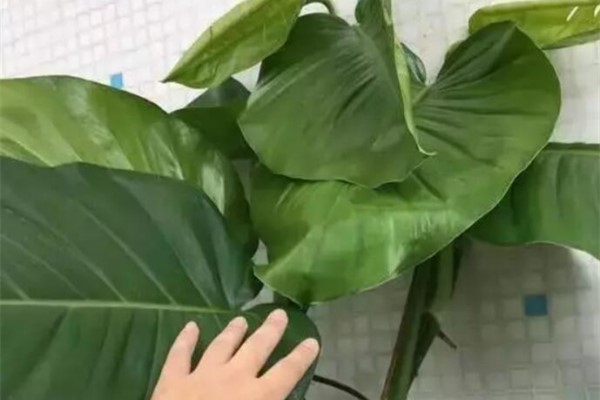
As soon as the green apple touches the plastic bottle, the roots rub off, and the leaves are bigger than the slap!

Green radish tied a plastic bottle, leaves 10 palm size!
Every time you see someone else's green radish column is big and dense, are you especially envious? But when it comes to doing it, you shake your head: that can't do, I don't have pvc pipe at home, don't be afraid, try plastic bottle to make green radish column today!
Production steps:
1, first prepare the required materials: empty plastic bottles, flower pots, green radish, etc. Cut off the top and bottom of the plastic bottle and poke holes in the wall.
2) Prepare the soil. Soak coconut bricks in water, mix them with pearlite in a ratio of 2:1, add a portion of rotting soil and stir evenly, and then become a nutritious soil with sufficient nutrients!
3. Prepare a larger flowerpot, put the plastic bottle with holes in the middle of the flowerpot, and then put pine needles on the bottom of the pot, and put the prepared nutrient soil into it.
4. Insert the green radish seedlings prepared in advance into the soil along a circle of plastic bottles.
5. Find another empty plastic bottle, cut off the bottom of the bottle, and then invert it into the first plastic bottle.
6. Add pine bark to plastic bottles. If you want green radish to grow more vigorously, you can also mix some compound fertilizer particles.
7, prepare palm, wrap the plastic bottle with palm, probably wrapped in 2 layers is enough, so a green radish column is ready! Later, as the green vine grows and climbs upward, the number of plastic bottles can be gradually increased.
8. During the growth process of green radish, the aerial roots will continue to take root in the palm bamboo and continue to climb upwards. And as the green radish column continues to grow, the stem of the green radish will become thicker and thicker, and the leaves will become larger and larger!
Add some water to the plastic bottle, and the green radish root system will bloom!
Many flower friends want to raise green radish, but there is no soil at home to do, it is better to try the method of hydroponics, not only take root quickly, but also do not occupy space at all, put it on the desk and so on can grow prosperous!
Operation steps:
1. Cut the empty plastic bottle from the middle, leaving only the lower half, and the upper half can be directly discarded.
2. Cut a few branches from the mother plant of green radish and dry the wound slightly for later use.
3, add about 2/3 of the water in the plastic bottle, throw the branches in the plastic bottle, pay attention to the lower end of the branches must be in contact with the water.
4. Basically, it only takes about 1 week for hydroponic green radish to take root!
5. You can also cut a section of the side of the plastic bottle, put the bottle horizontally, and then put the green radish branches horizontally into the plastic bottle, so that the air roots of the green radish branches come into contact with the water surface, and soon new roots can emerge!
Add some ingredients to the plastic bottle and the green radish will take root quickly!
Autumn is a good time for cuttings, if missed now, can only wait until next year! Moreover, the cuttings did not need any professional flower pots at all. A few plastic bottles were completely done!
Operation steps:
1. Cut strong branches from the mother plant of green radish, cut the branches into small pieces of 5-7cm, and it is best to bring some aerial roots on each branch, so that it is easier to take root.
2. Prepare an empty plastic bottle, cut the plastic bottle into two sections with scissors, and then tie a few small holes in the bottom of the plastic bottle for water permeability.
3. Fill the plastic bottle with perlite or loose and breathable nutrient soil, insert the green radish branches that need to be cut directly into the plastic bottle, and then put them in the plastic bottle.
4. It only takes about 7-10 days for green radish cuttings in plastic bottles to take root!
- Prev

Autumn is coming, hurry to add some "it" to the pot of longevity flowers.
Longevity flowers must be no stranger to everyone! This longevity flower is flowering all year round, especially in winter, many flowers have entered the dormancy period, but longevity flowers are still blooming, especially during the Spring Festival.
- Next

The gentleman orchid is raised in this way in autumn, the leaves are shiny and the flower bracts are shining.
Autumn is coming, the summer heat has faded, and the orchid has gradually resumed its growth. Changing pots and changing soil is necessary, and fertilization is also necessary. I wonder if the flower friends who raise orchids have taken action. If you do this with Huahua, you are sure to blossom in winter.
Related
- What if the leaves of potted flowers turn yellow?
- Florescence Control of several Flowers
- Anti-freezing technology and post-freezing nursing technology of flowers
- What is the classification of flowers? What are the common methods of flower classification?
- Prevention and control of alkali and acid damage of flowers in courtyard
- Technology of Anti-freezing and restoring growth of Flower seedlings in greenhouse and greenhouse
- How does flower fertilization not hurt the root? Fertilization technology of flowers
- Key points of disinfection in flower greenhouse
- Several pesticides that are banned or used cautiously in flowers
- How to fertilize the flowers that watch the leaves?

