8 kinds of common flowers quickly cut, 100% live!
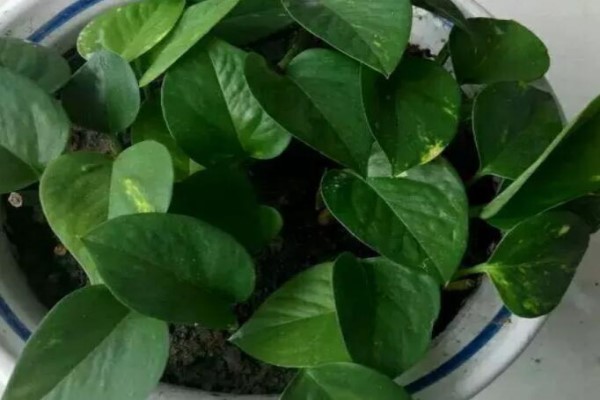
Green radish cuttings like this, 100% survival!
1. Cut off the thick and fresh green vine with scissors. It is best to disinfect the scissors with a lighter in advance.
2. Cut the green radish branches into several small sections, each section contains 2 nodes, with 1 leaf and 1 bud point in the middle.
3. Prepare decaying soil, peat soil, pearlite, according to the ratio of 2:2:1 evenly mixed, preferably sterilized in advance, not disinfected on the sun for a day. Then spray water, so that the soil slightly moist, can be used to plant green radish!
4. Circle the vine and insert it vertically into the soil, with the leaves facing up.
5. After cuttage is finished, spray water, put in ventilated and cool place, soil surface is dry again irrigate water, can grow small bud very quickly!
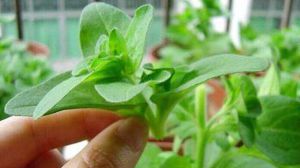
Longevity flowers such cuttings, 1 pot into 10 pots!
1. Usually pruned down the longevity flower branches, do not throw away, cut it with clean, cut into a number of small pieces, and then put a cool ventilated place to dry the wound.
2. Prepare clean decaying soil, stir in some pearlite and spray water to make the soil slightly moist and moist. If there is no rotten leaf soil at home, it is also OK to mix some river sand with clean garden soil.
3. Insert the lower end of the longevity flower branch into the soil, water it on one side, and put it on the east and west balcony or east and west windowsill of astigmatism.
4. Without ten days and a half, the long-lived branches of cuttings can grow a lot of white flower roots!
5. After rooting, more sun, 1 week or so irrigation 1 time water, irrigation 1 time a month potassium dihydrogen phosphate, a few months later, flowering!
Tiger orchid leaf hydroponic cuttage, 1 week rooting!
1. Break off the strong, thick leaves, cut the leaves into several small pieces, each section of about 10 cm, after cutting, put in a ventilated and cool place to dry for 2 days.
2. If you see the incision of tiger skin orchid, a little atrophy, wilting, it means that the air is good, a little air than not air, rooting faster, higher survival rate.
3. Find a glass, decorate the water, put the tiger skin orchid into 3-5 cm, be careful not to mix up the upper and lower, otherwise it will not take root.
4. Insist on 4 days or so for 1 time water, water can add a little carbendazim, so 2 weeks, you can grow roots!
5. After the root system is born, add some nutrient solution or aspirin to the water. In about 2 months, you can grow small buds!
Sponge + wet wipes, osmanthus cuttings 100% live!
1. Prepare a dishwashing sponge, cut it into small pieces and drill holes in each piece.
2. Cut the semi-lignified branches of osmanthus fragrans, about 10-15 cm in length, keep 2-3 leaves at the upper end, and cut obliquely at the lower end.
3. Put the branches into potassium permanganate solution, soak for 5-10 minutes, and disinfect. Insert the twig into the cleaning sponge.
4. Wrap the sponge in a wet tissue soaked in water.
5. Put the sponge wrapped in wet tissue into a plastic bottle and pour 1-2 cm of water into the bottom.
6. Put the plastic bottle cap on the lid, leave a gap, and then put it on the indoor south balcony, south windowsill, east and west balcony, east and west windowsill, etc.
7. Sponge, wet tissue can maintain a high humidity, less than a month, osmanthus can take root!
Gardenia root pinch branches, throw water live!
1. Cut off the healthy half year old gardenia branches and cut off the lower branches, leaving only the top 2 leaves.
2. The foam box not used at home can be washed clean and pierced with an awl.
3.1 hole and 1 branch, insert gardenia branches into small holes one by one, float in a container with water, and cover the upper layer with a plastic bag to keep moisture.
4. Ten and a half days or so, gardenia branches can grow white roots!
5. After rooting, you can gradually bask in the sun, and then transplant the branches in a separate pot for maintenance in 1-2 weeks.
The triangular plum is inserted like this, and the white root rubs out!
1. Cutting triangle plum, can use coconut brick, in advance with carbendazim soaking water disinfection for 30-40 minutes, after soaking a little pinch dry, pour into a disposable cup.
2. Cut the bougainvillea branches into palm length, remove the lower leaves, leaving only the upper 2 pairs of left and right leaves.
3. Insert the bougainvillea branches into the coconut brick soil, then put them into a transparent storage box, spray water on the box wall of the storage box, and then cover the lid, do not cover tightly, leaving a gap.
4. Put the storage box in a cool and ventilated place, open the lid twice a day, spray water to moisturize, keep water on the box wall, and take root in about 20 days.
The camellias are inserted like this, one insertion saves life!
1. Select healthy and robust, growth of about half a year of Camellia branches, this branch tissue active, full axillary buds most likely to survive.
2. Trim camellia cuttings so that each contains 2 leaves, soak in carbendazim solution for 15-20 minutes, then remove and dry.
3. Prepare clean river sand, soak and disinfect with potassium permanganate solution in advance, so as to reduce black stems and improve survival rate.
Disinfect the river sand, pour it into the flowerpot, spray it with clean water, and poke the hole on the soil surface with your finger.
4. Insert the camellia branches into the holes, compact them slightly, cover them with a thin film, and place them in a ventilated place for curing. Turn on the water spray 1-2 times a day, and it will take root soon!
Cuckoo like this inserted, inserted a few live a few!
1. Cut off healthy, disease-free azalea branches with scissors, not too long 5-10 cm or so, cut off and soak in carbendazim for disinfection.
2. Prepare a mineral water bottle, cut it from the middle, leave a little connection, do not cut it completely.
3. Use an awl to poke a number of holes in the bottom of the plastic bottle, and then put clean pearlite into the bottom half of the plastic bottle, squat into a container filled with water to soak in a basin, or pour it through.
4. Insert the carbendazim soaked azalea branches into moist pearlite and place them in a tray.
5. Stick the upper and lower parts of the plastic bottle together with tape and pour water into the tray. During rooting, ensure that there is always water in the tray!
6. Put the whole cutting device in a ventilated place, 1-2 months, azalea can grow roots ~!

- Prev
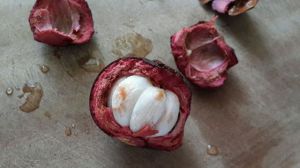
What is the yellow one in mangosteen?
Mangosteen itself will secrete yellow substances, which may be caused by damage encountered during picking or transportation, resulting in the secretion of yellow substances. It is also possible that the fruit is not fully ripe yellow pulp, you can eat, but will be astringent. Another possibility is that it has been kept for too long, it is not fresh, and the flesh will go bad and is not recommended.
- Next
How to pick the heart of longevity flowers
The coring of longevity flowers is usually carried out from March to September, pruning branches with a height of more than 12 centimeters and the topmost new buds to promote the development of its lateral branches. In addition, after coring, it is necessary to apply an appropriate amount of compound fertilizer to promote the growth of lateral branches.
Related
- What if the leaves of potted flowers turn yellow?
- Florescence Control of several Flowers
- Anti-freezing technology and post-freezing nursing technology of flowers
- What is the classification of flowers? What are the common methods of flower classification?
- Prevention and control of alkali and acid damage of flowers in courtyard
- Technology of Anti-freezing and restoring growth of Flower seedlings in greenhouse and greenhouse
- How does flower fertilization not hurt the root? Fertilization technology of flowers
- Key points of disinfection in flower greenhouse
- Several pesticides that are banned or used cautiously in flowers
- How to fertilize the flowers that watch the leaves?